
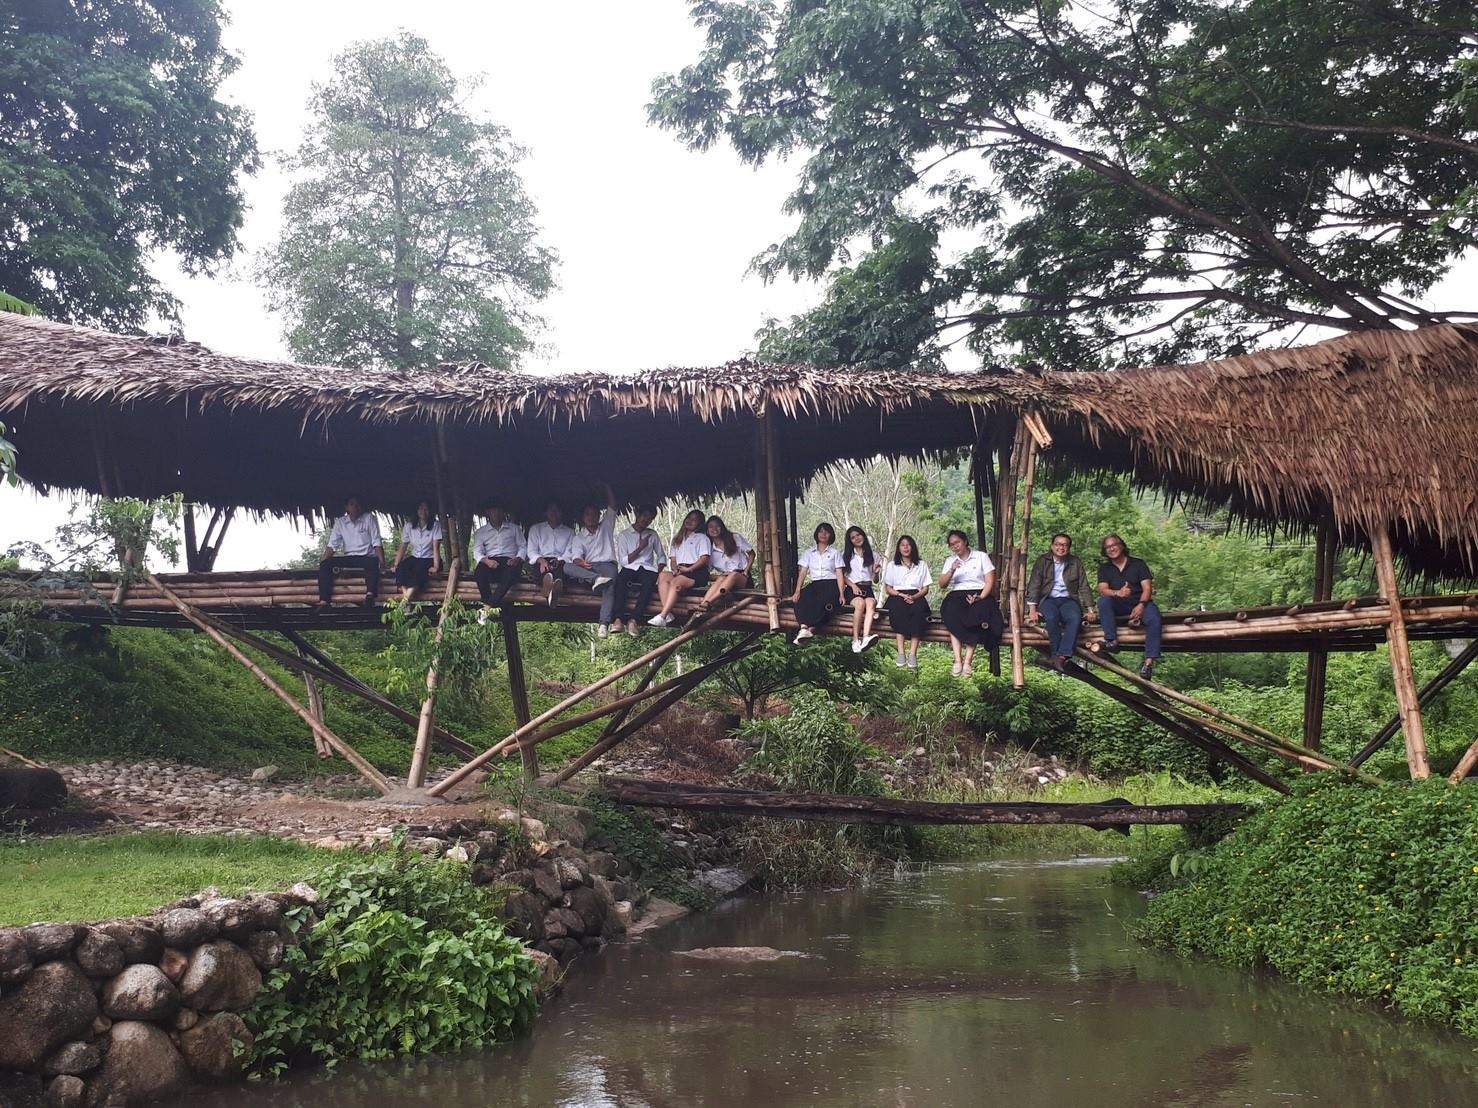
โปรเจคนี้เป็นโปรเจคจุดเริ่มต้นของทีม Bamboosaurus เมื่อย้อนกลับไปในครั้งที่ยังเป็นนักศึกษาคณะสถาปัตยกรรมศาสตร์และการผังเมือง มหาวิทยาลัยธรรมศาสตร์ ใน Bamboo Studio ลำดับที่ 8+1 ในปี 2018 ได้มีโจทย์ในการออกก่อแบบก่อสร้างสถาปัตยกรรมไผ่ที่เป็นสะพาน โดยสะพานจะใช้ข้ามน้ำจากฝั่งรีสอร์ทไปฝั่งลานกางเต้นท์ เนื่องจากพื้นที่ทั้งสองฝั่งมีความสัมพันธ์กันในเชิงฟังก์ชันการใช้งาน
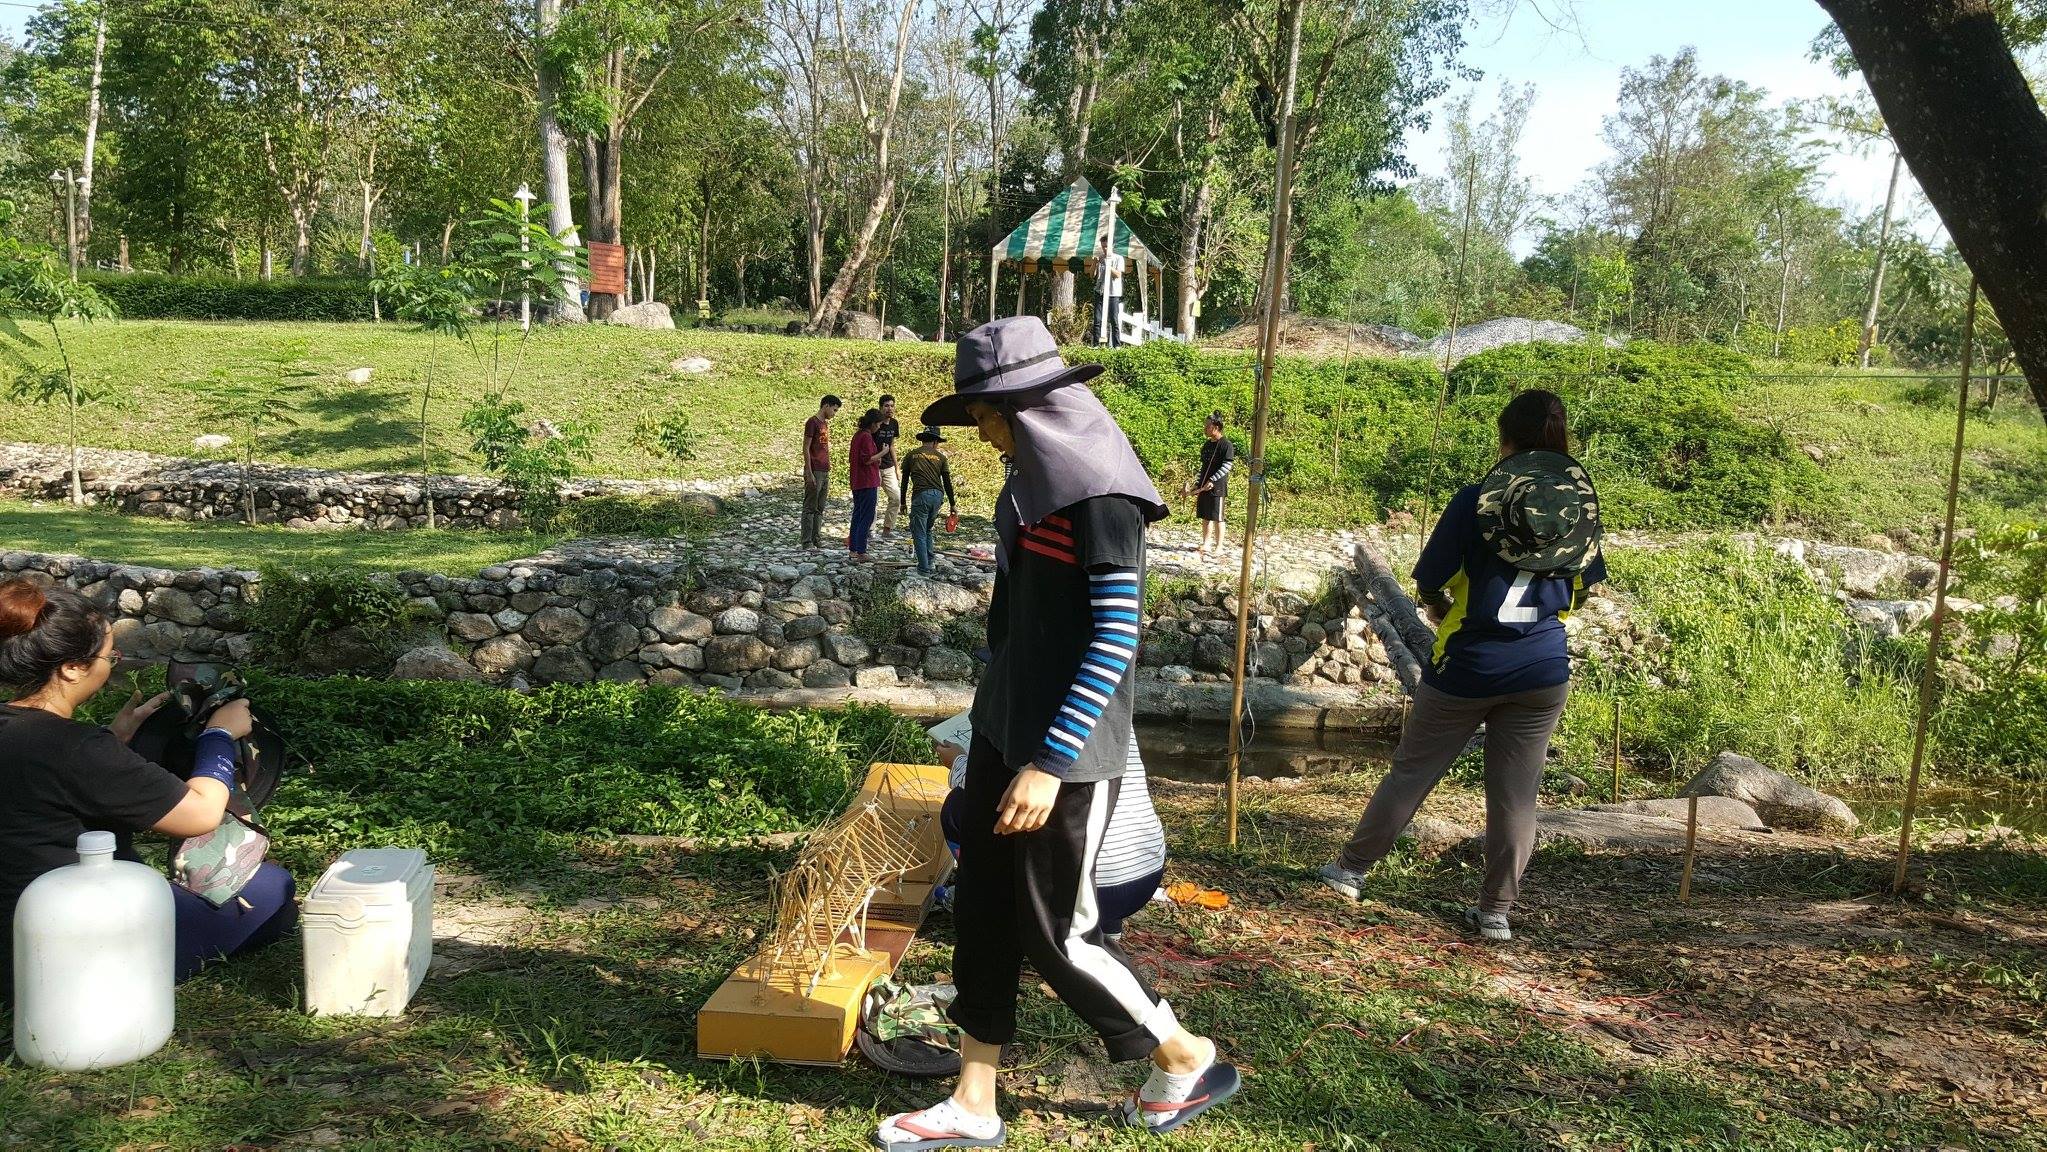
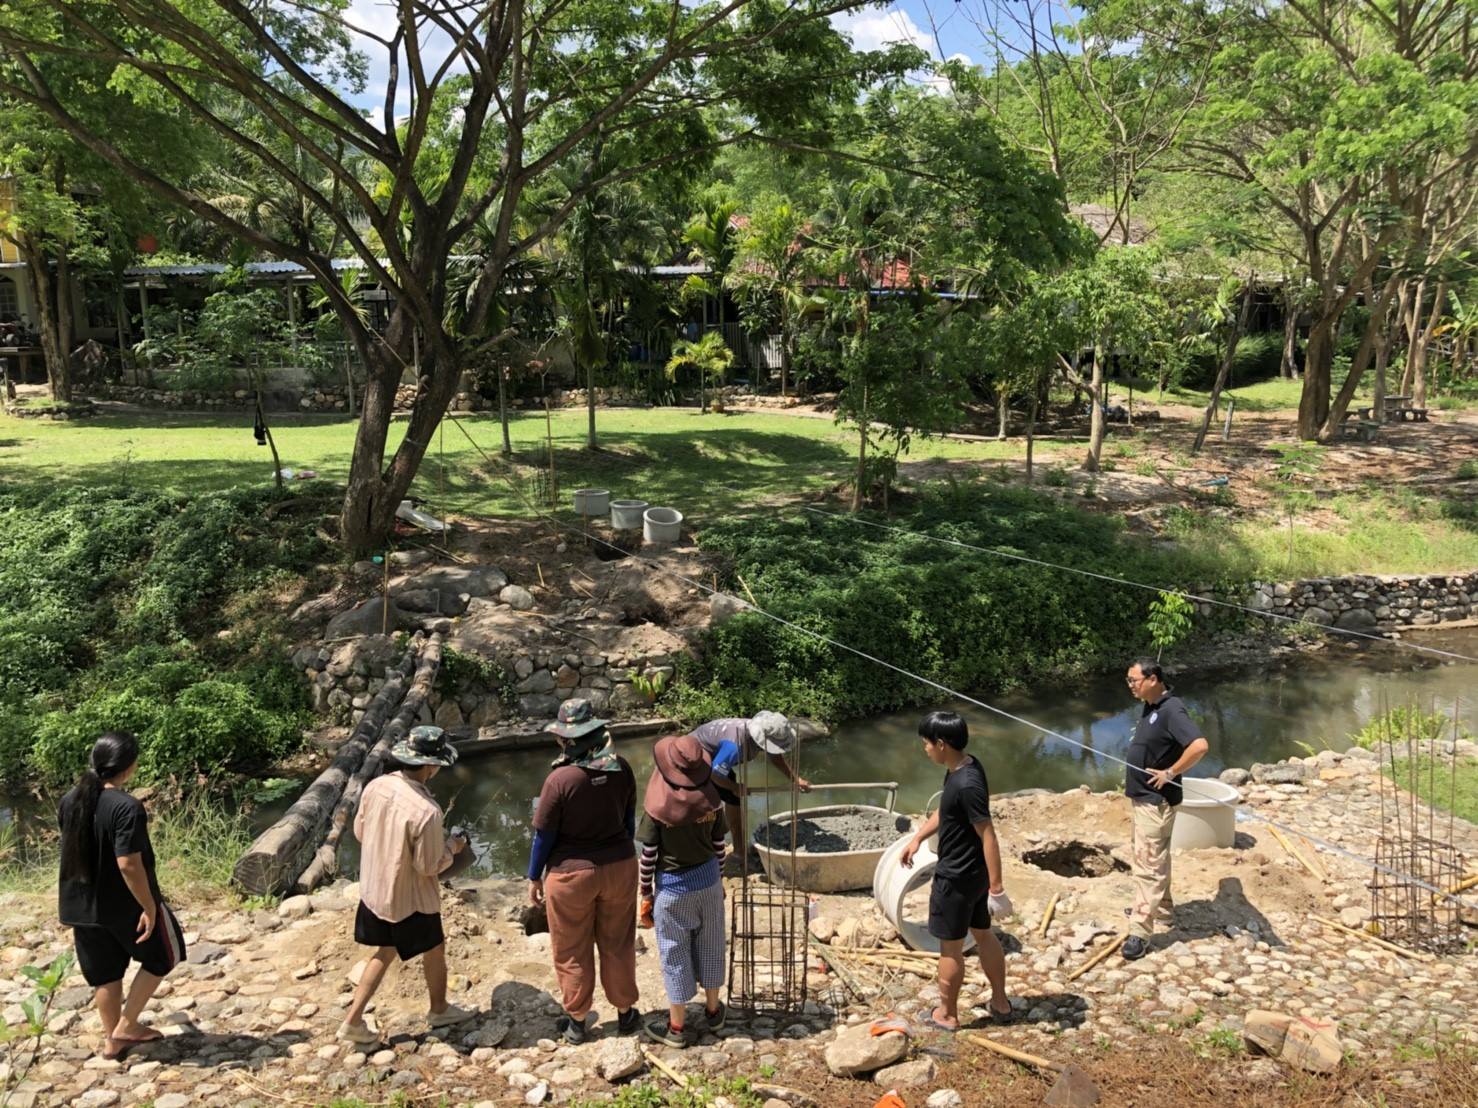
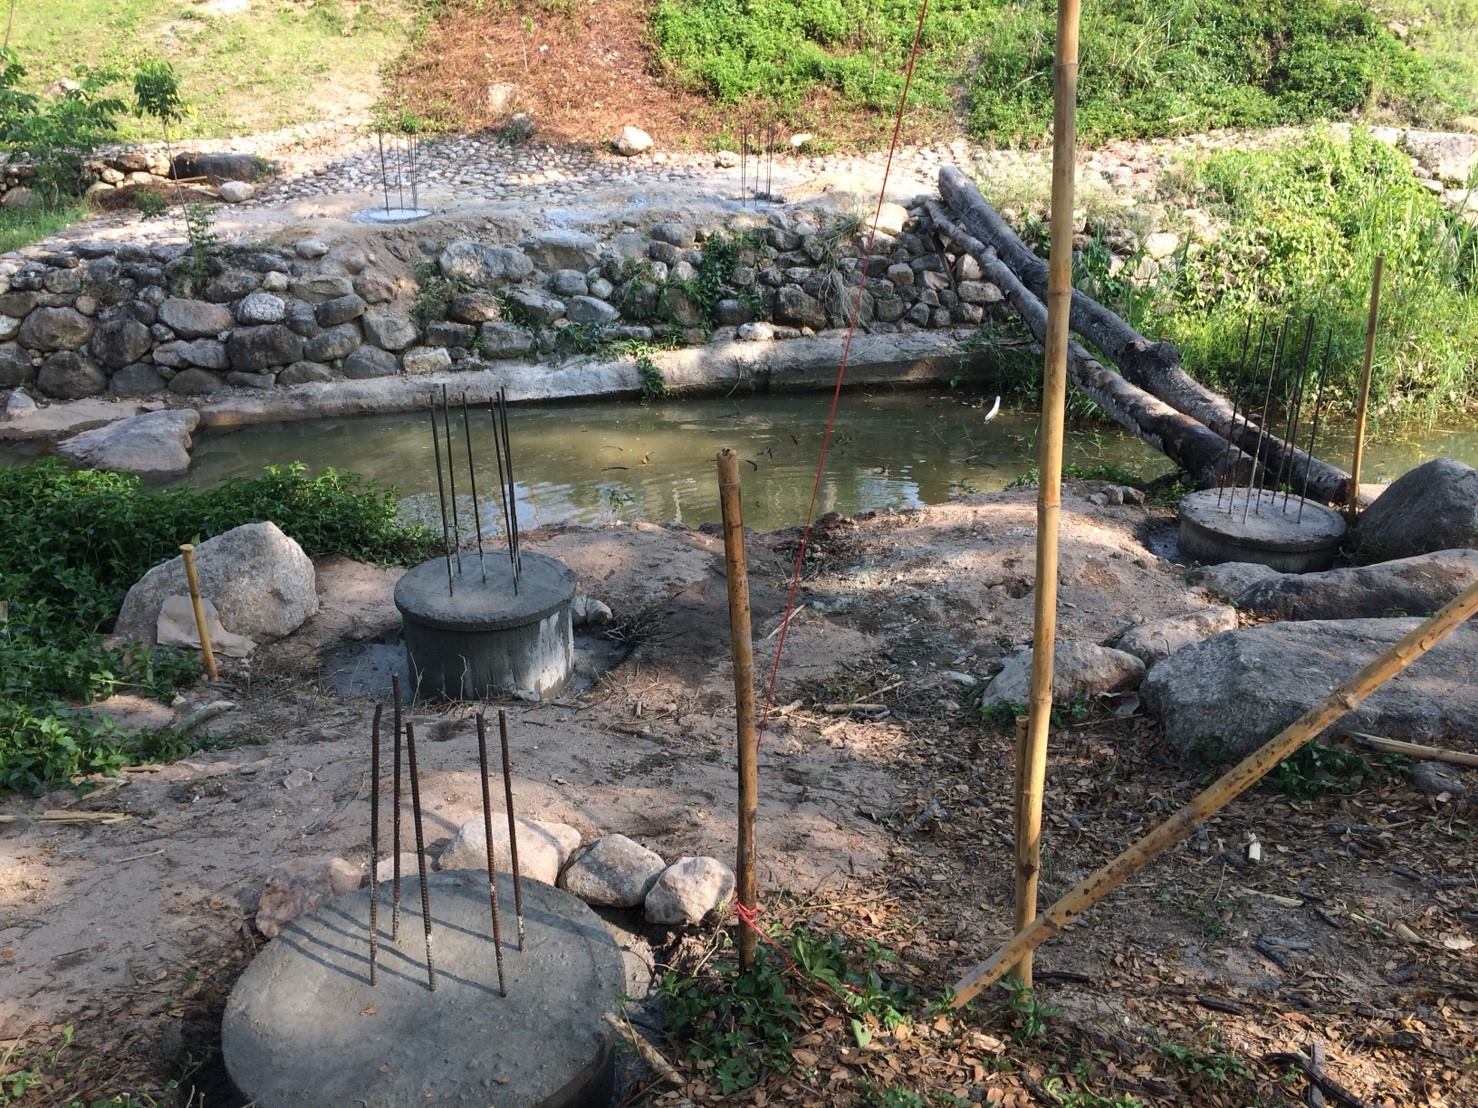
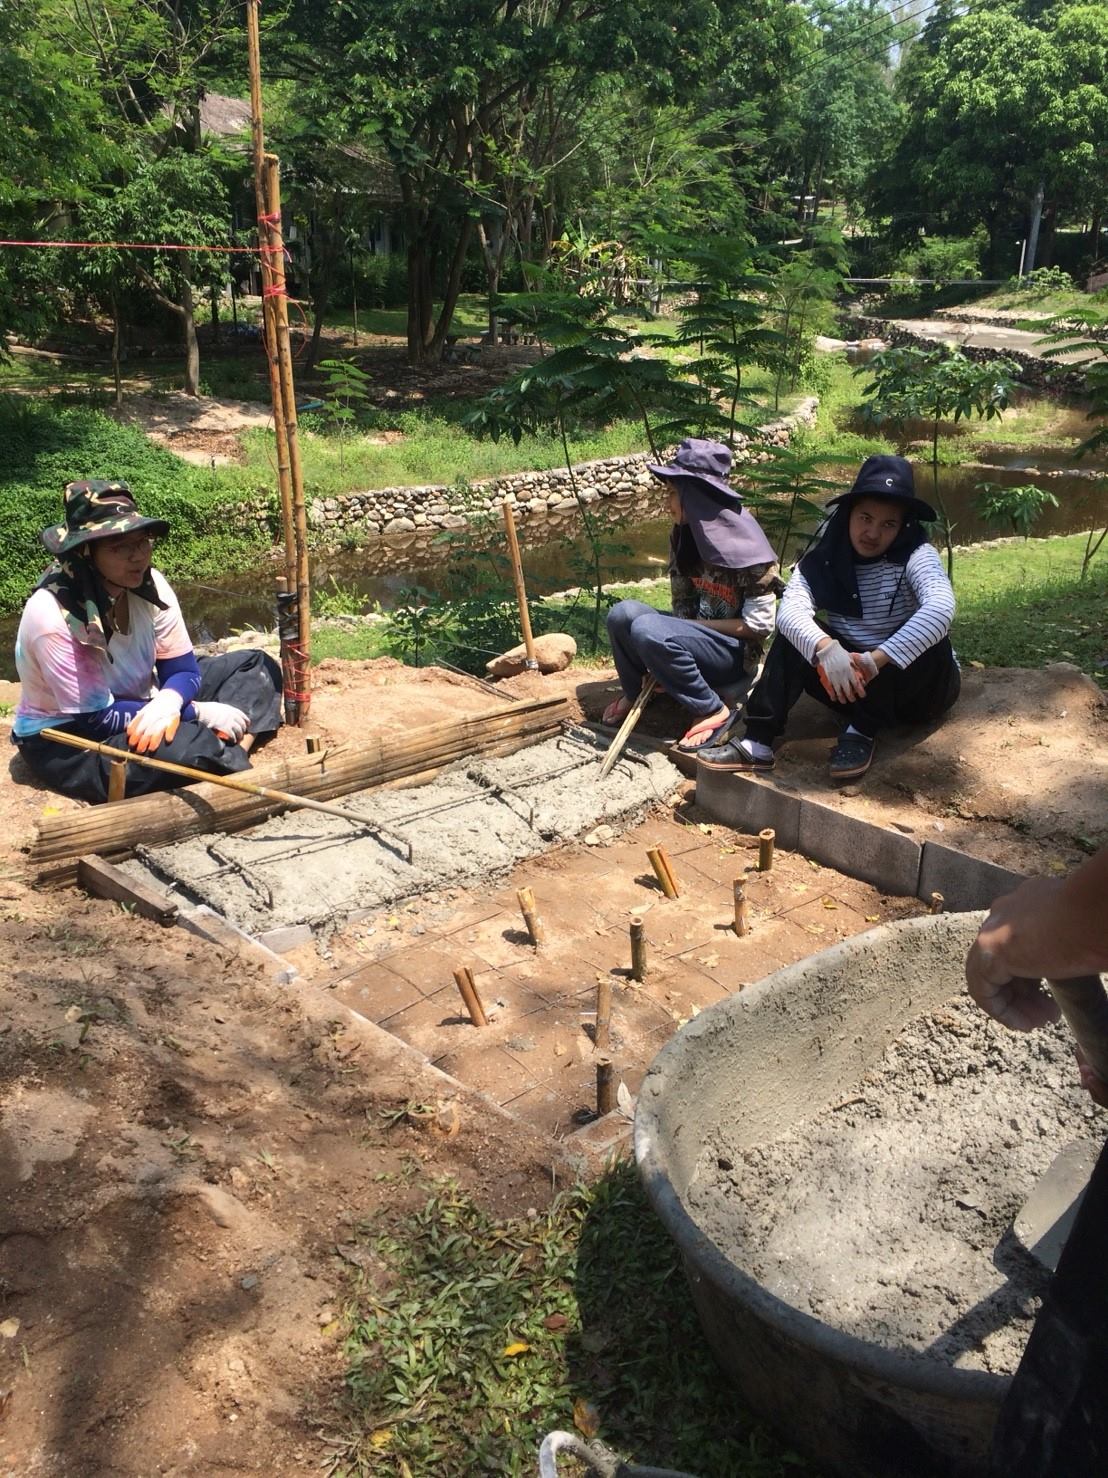
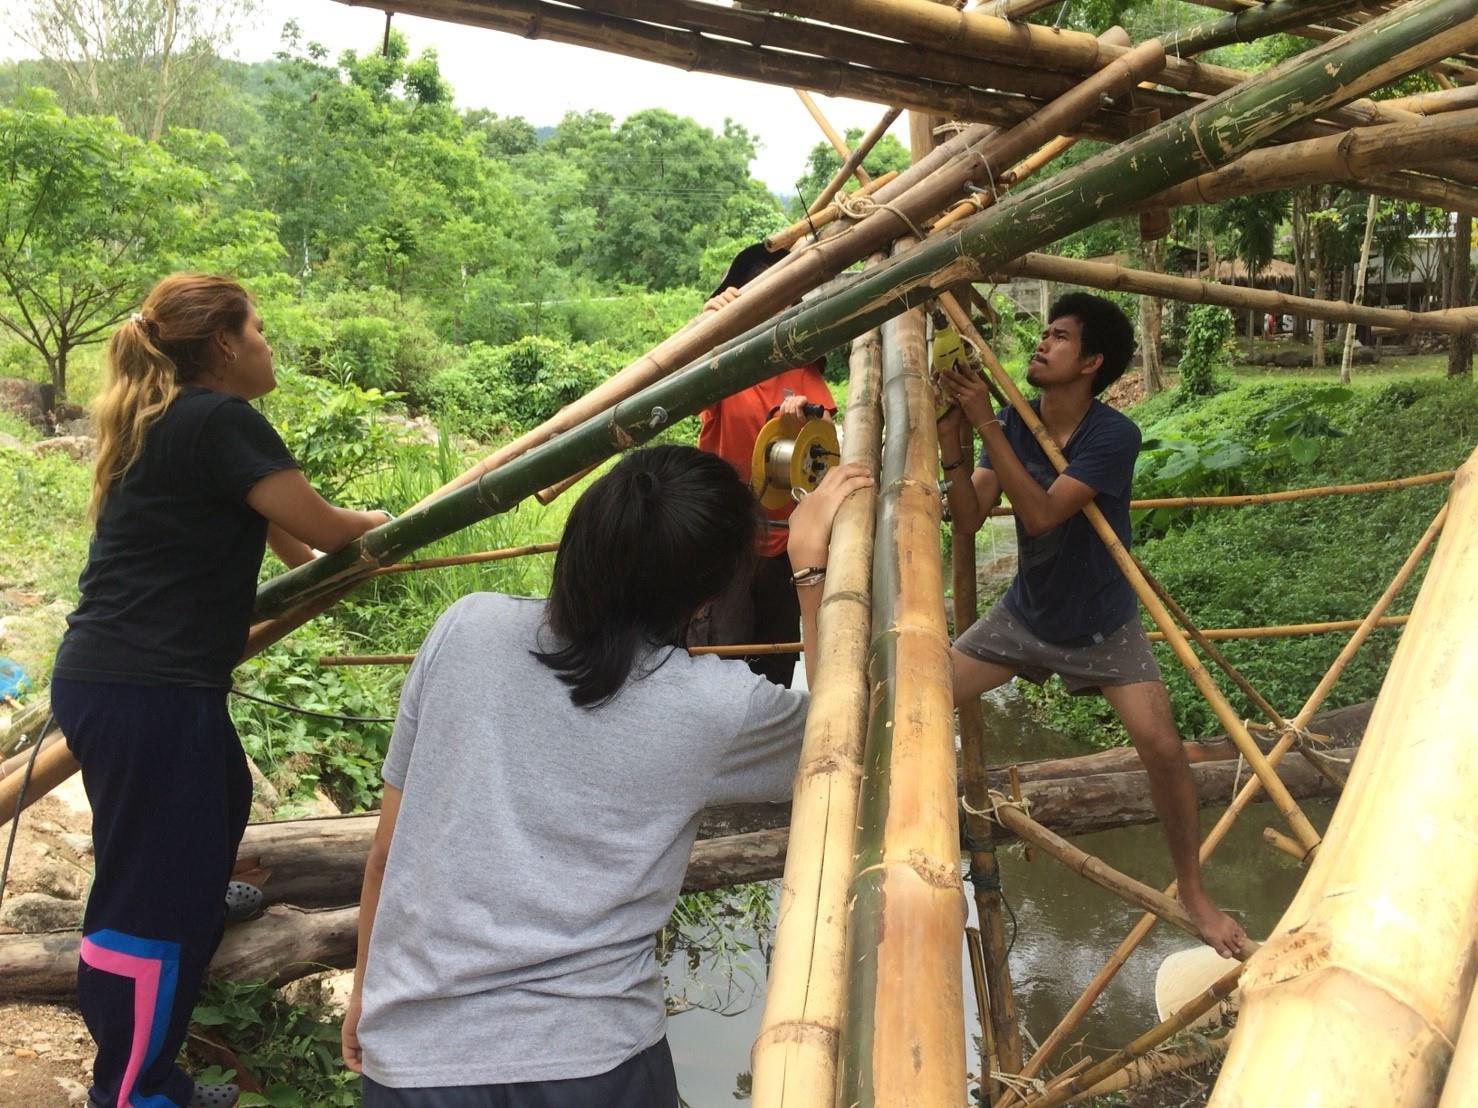
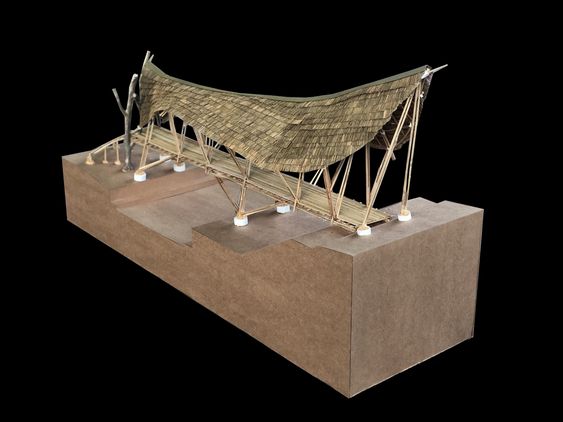
project นี้เริ่มตั้งแต่การเตรียมไผ่ ลงไซต์ วัดระดับน้ำ ถ่ายระดับน้ำ ผูกเหล็ก ลงตอม่อเอง ไปตลอดจนการก่อสร้างจริงๆตามโมเดลที่ได้ออกแบบไว้ ซึ่งเป็นสิ่งที่จุดประกายเป็น
ทีมแบมบูซอรัสในภายหลัง
แนวคิดการออกแบบ
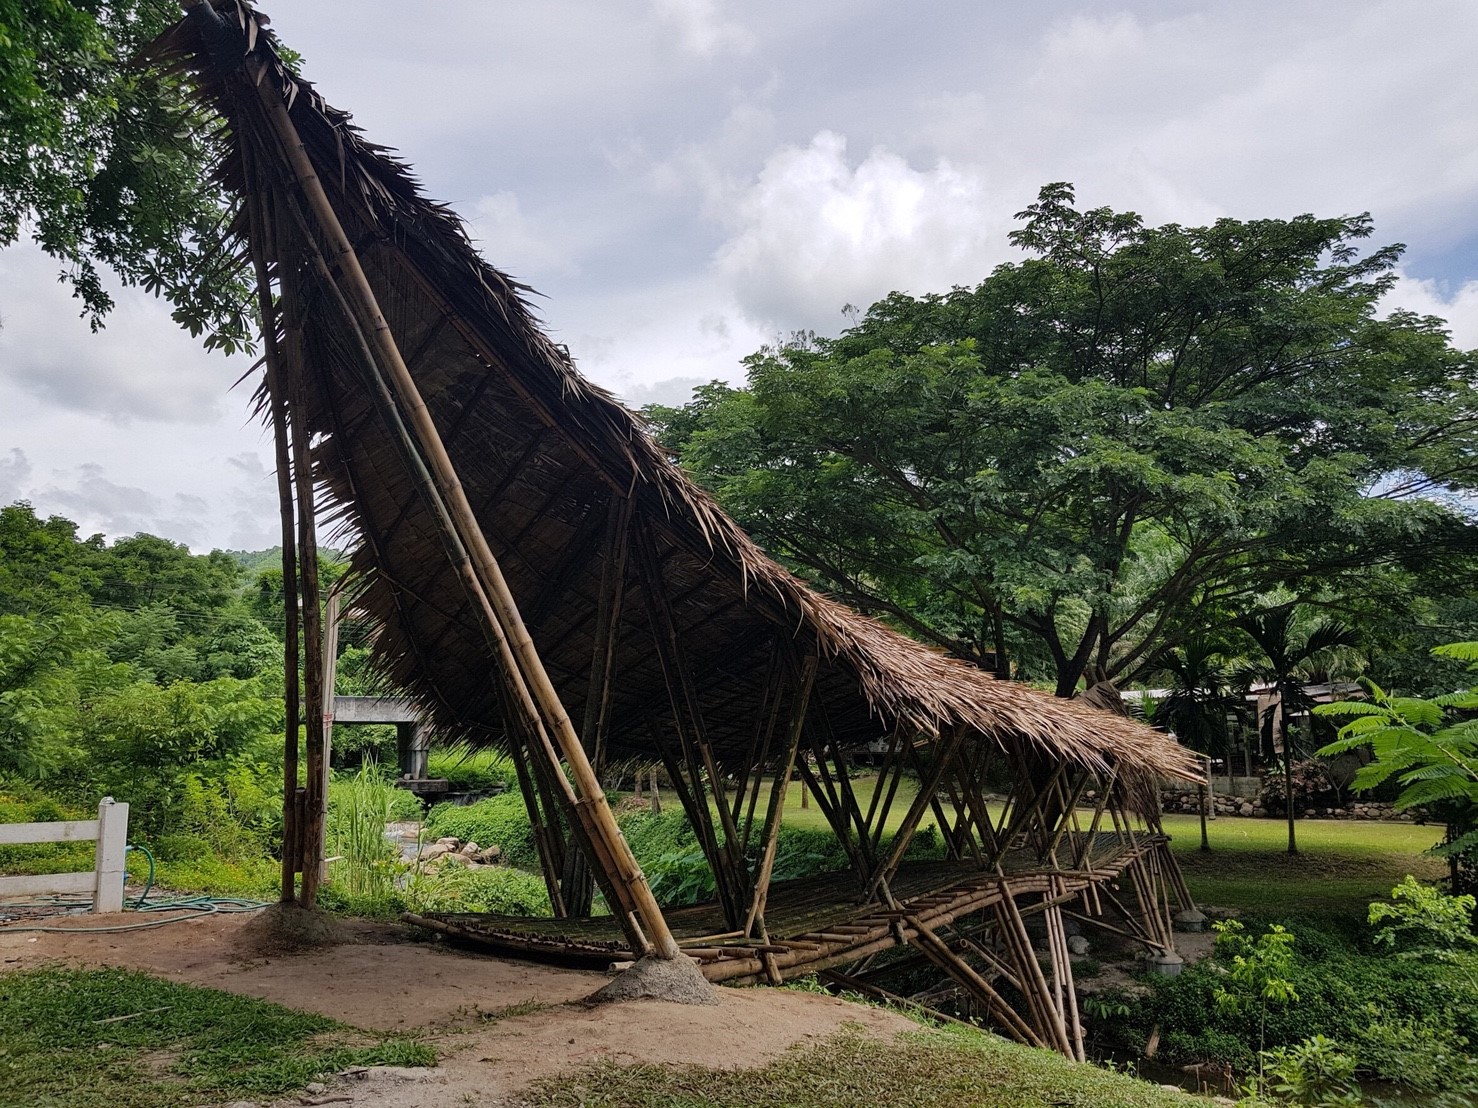
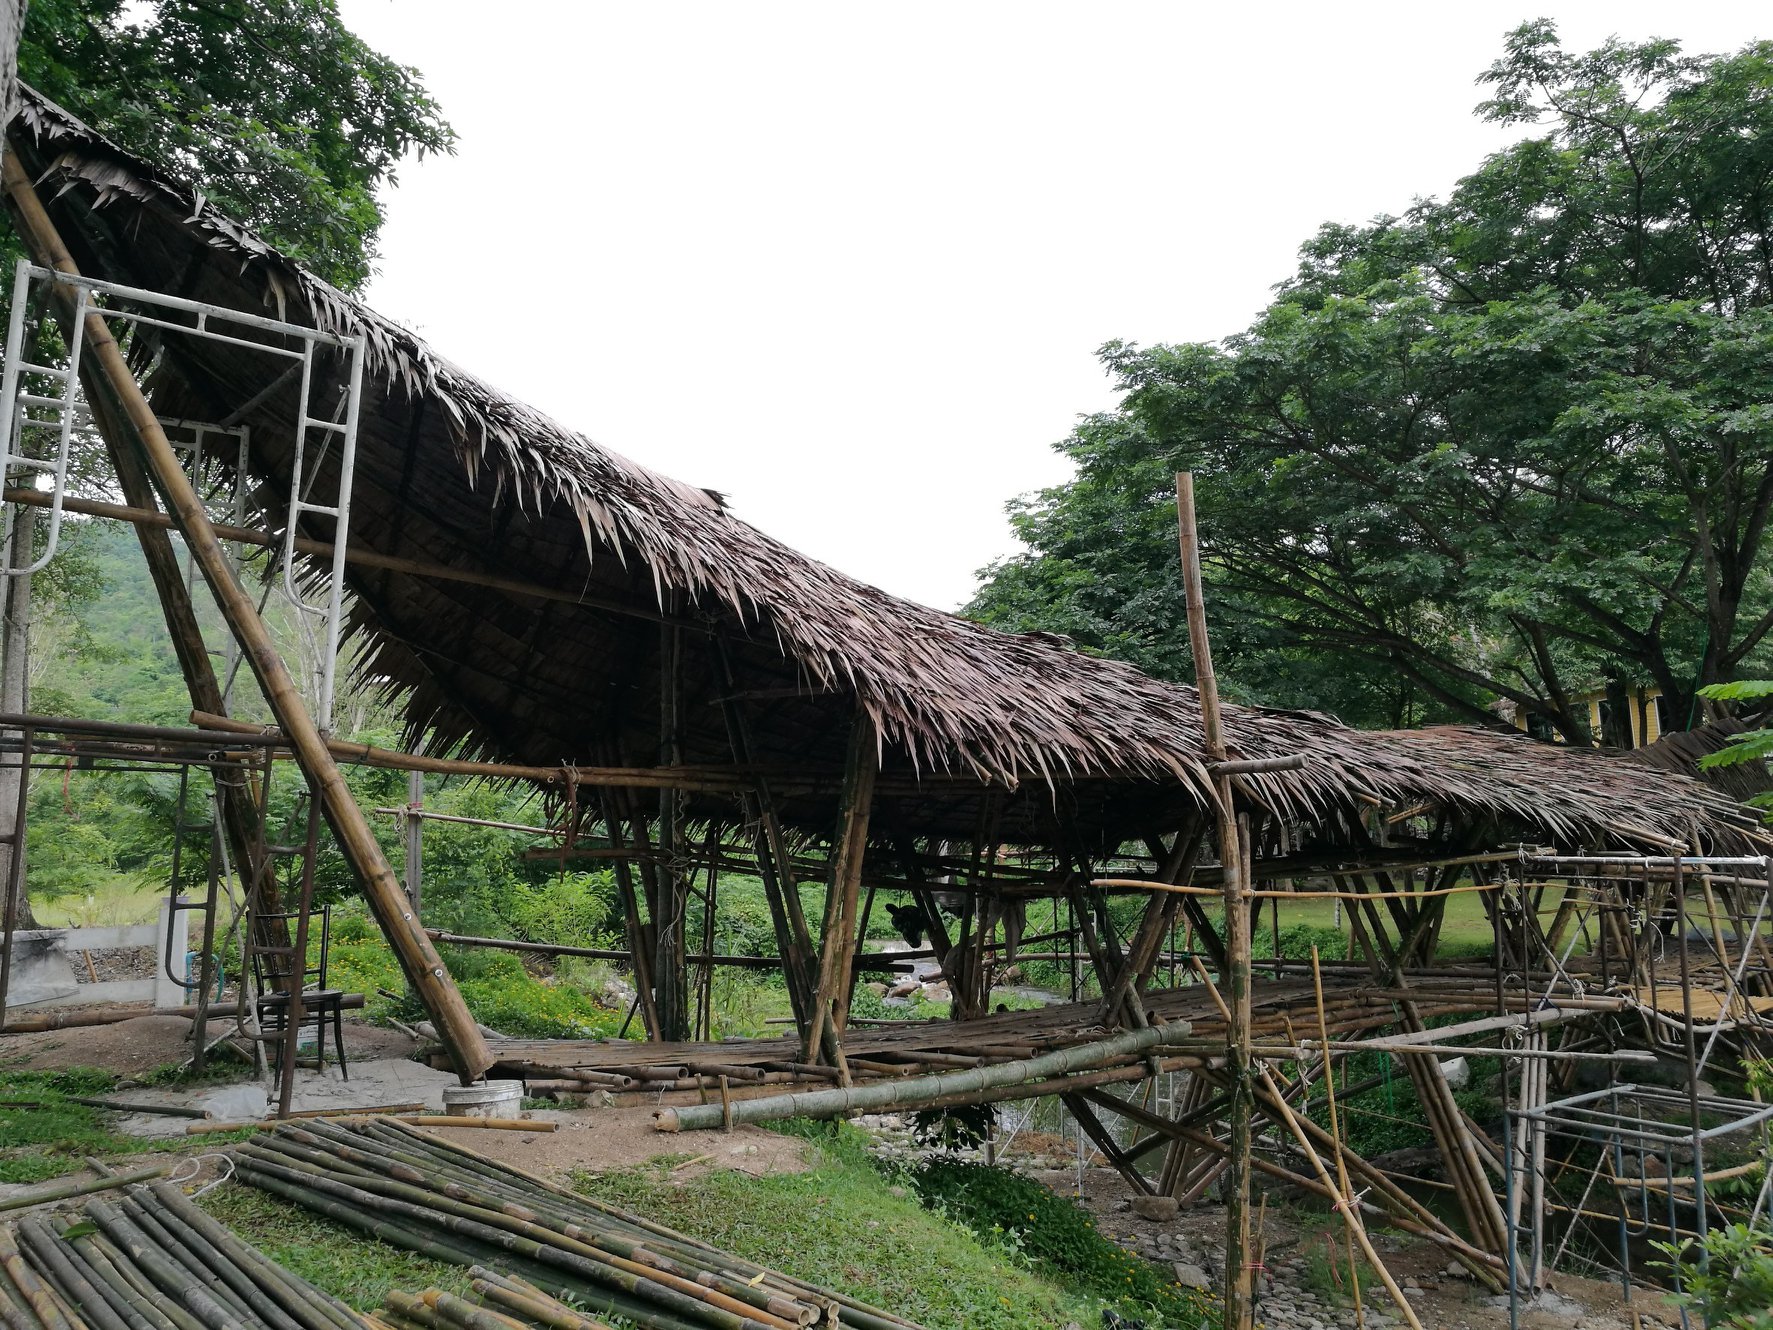
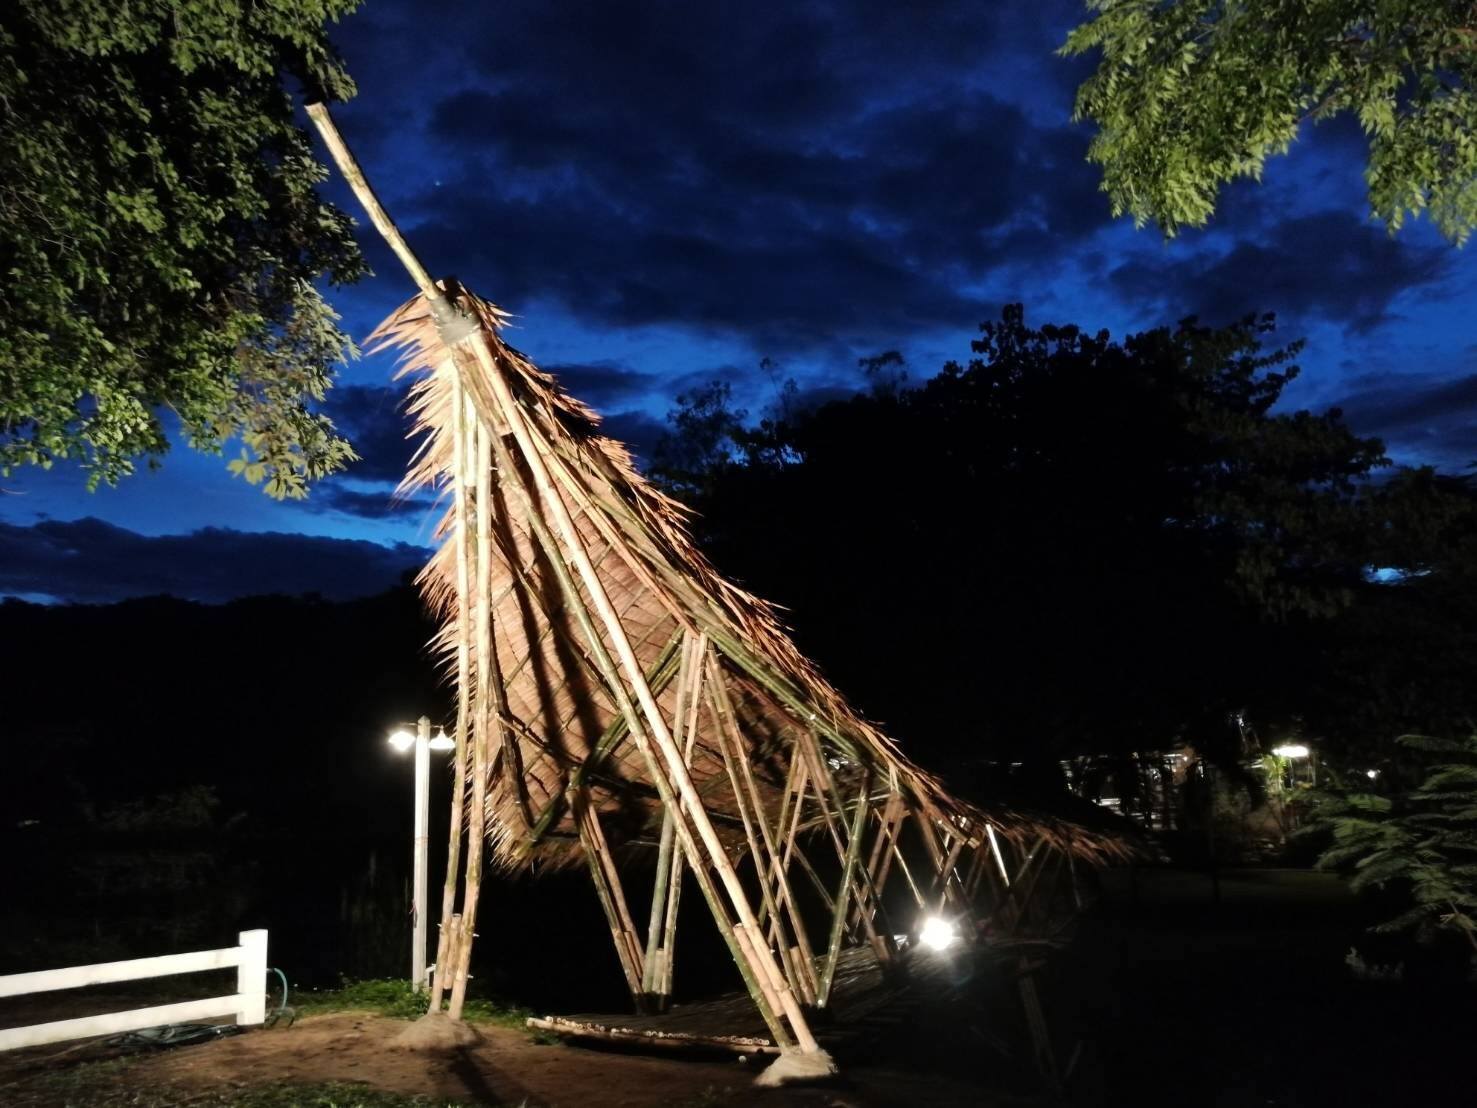
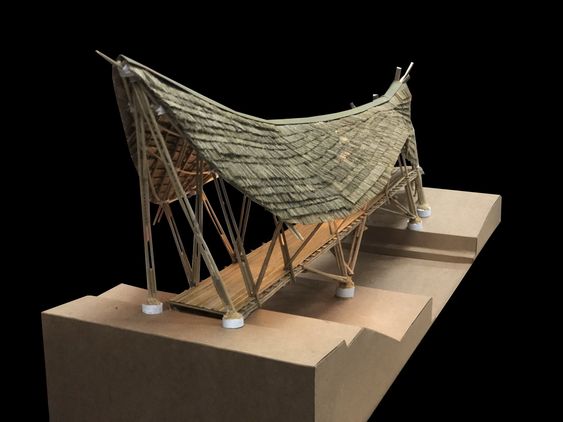
หลังจากได้เห็นพื้นที่จริงและกลับมาวิเคราะห์ จะนำความแข็งแรงและความยืดหยุ่นที่เป็นลักษณะเด่นของไผ่มาใช้ในการออกแบบสะพานโดยให้โครงสร้างหลักเป็นโครงสร้างที่สร้างความรู้สึกมั่นคงแข็งแรงใช้เส้นเฉียงเส้นนอนของลักษณะรูปสามเหลี่ยมเป็นหลัก ส่วนหลังคาดึงความยืดหยุ่นของไผ่มาใช้โดยการสร้างรูปทรง Freeform พัฒนาเส้นสายมาจากกลีบดอกบัวซึ่งอยู่ในชื่อของรีสอร์ทที่พักที่ทำการก่อสร้างในพื้นที่ ลักษณะที่ปรากฏออกมาผ่านตัวงานโครงสร้างและสถาปัตยกรรมแสดงให้เห็นถึงการวิเคราะห์บริบทของพื้นที่และภูมิทัศน์ทางธรรมชาติโดยรอบที่เป็นจุดเด่นด้วยการเปิดมุมมองของงานสถาปัตยกรรมจากภายในสู่ภายนอกที่ให้ความรู้สึกแตกต่างออกไปตลอดช่วงสะพาน อีกทั้งยังนำลักษณะโครงสร้างของต้นจามจุรีมาเป็นเสารับน้ำหนักซึ่งช่วยลดโครงสร้างฐานรากไปได้ 1 จุดและเพิ่มจุดเด่นให้กับงานสถาปัตยกรรม
การเตรียมวัสดุ
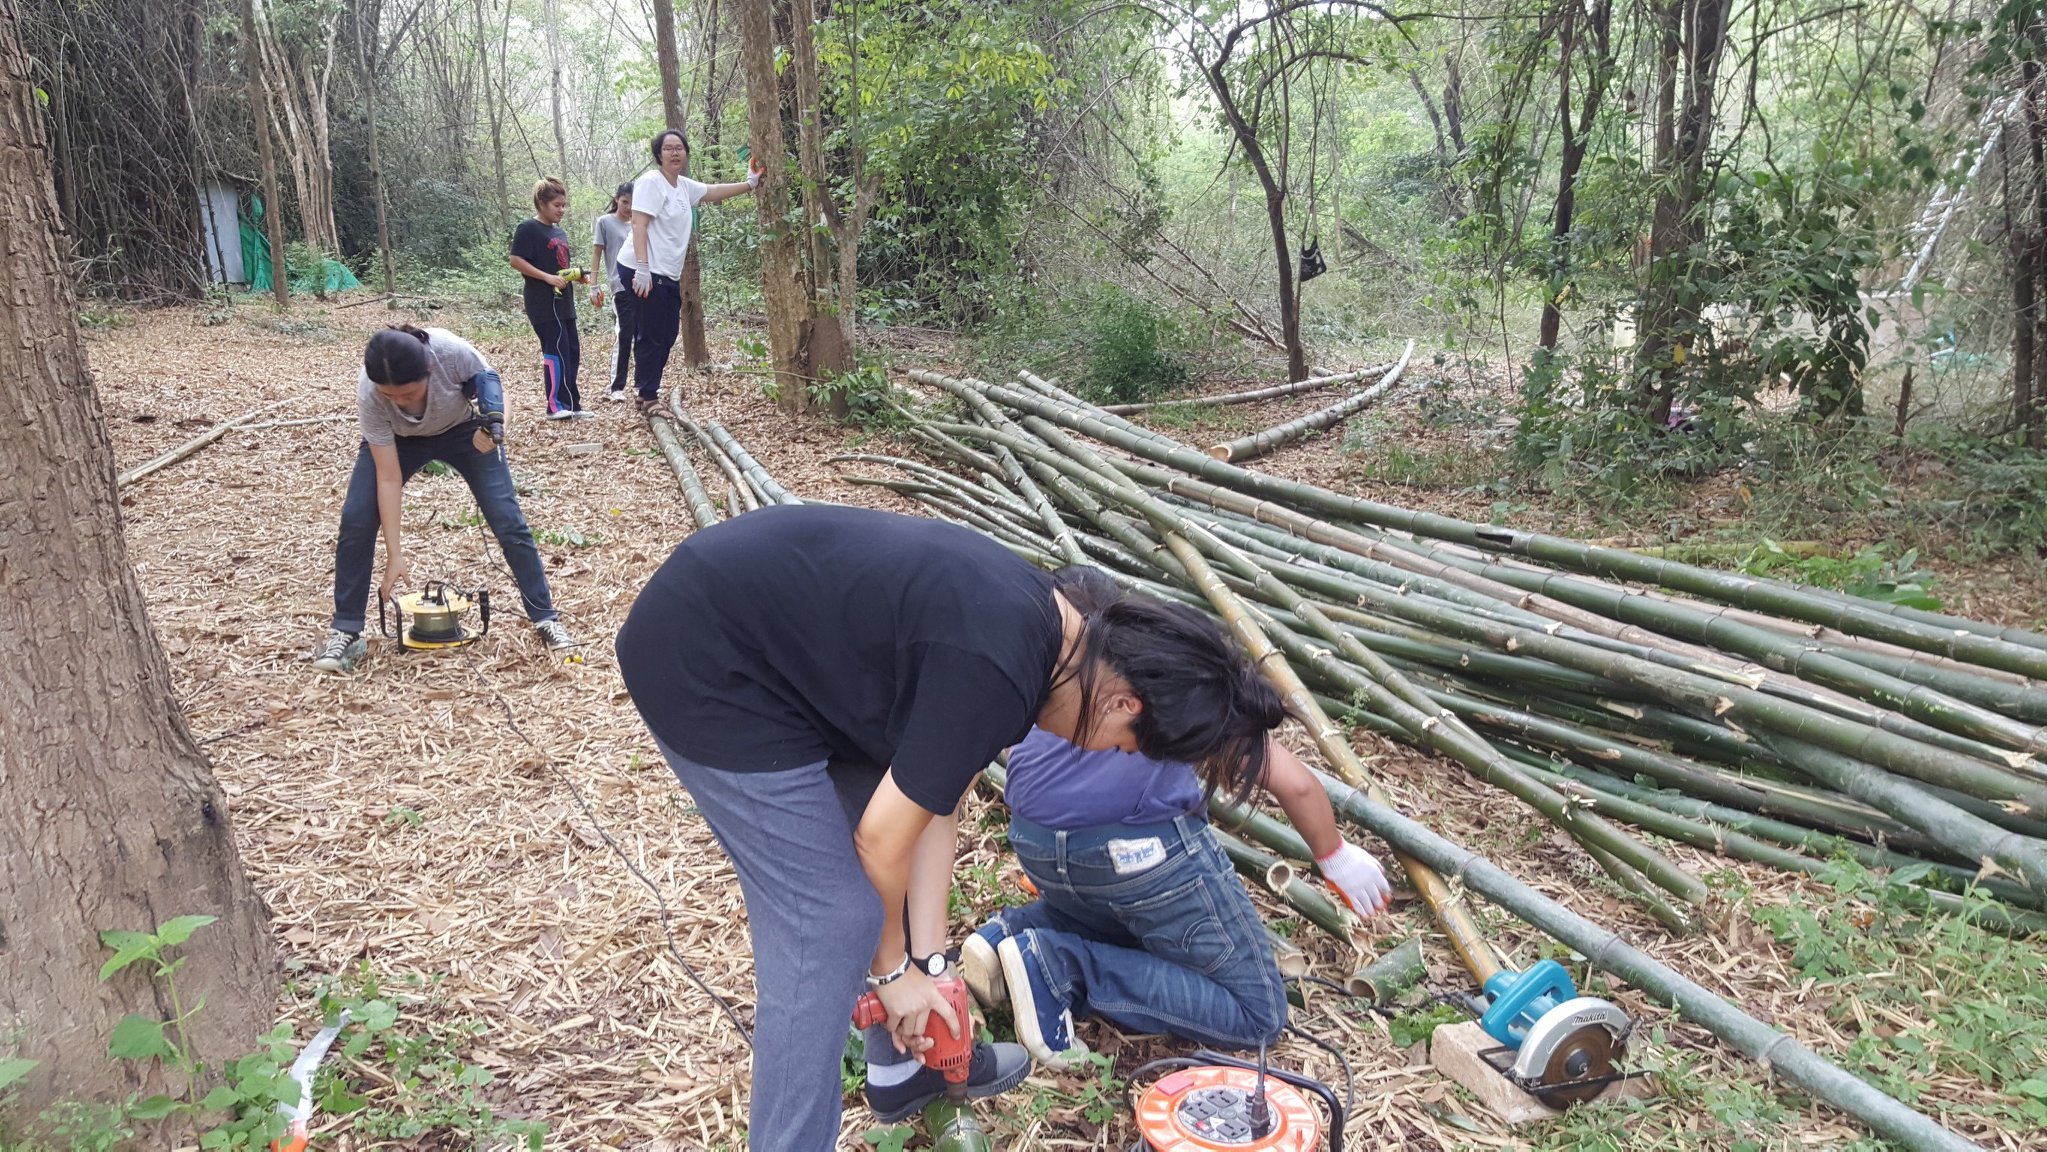
เริ่มจากการเตรียมไผ่โดยตัดจากพื้นที่สวนไผ่ใกล้เคียงก่อนดำเนินการถนอมไผ่และนำไปใช้โดยขั้นตอนมีดังนี้
1.ขุดบ่อขนาด 8×1.5×1.2 ม. และปูทับด้วยพลาสติกปูบ่อ
2.ผสมน้ำยา Timbor เป็นชื่อทางการค้าของ Disodium Octaborate Tetrahydrate (DOT) ซึ่งเป็นสารประกอบของ โบรอน (Boron)
ใช้เป็นสารป้องกันและกำจัดปลวก เชื้อรา และแมลงที่ทำลายไม้ ลงในบ่อที่เตรียมไว้และปล่อยน้ำลงในบ่อให้มีความสูงที่ระดับ 40 ซม. จากก้นบ่อ
3.ตัดไผ่จากสวนให้ได้ขนาด 6-7 ม. หลังจากนั้นใช้สว่านเจาะทะลวงปล้องไผ่ตลอดแนวลำเพื่อให้สารละลายสามารถเข้าถึงได้ตลอดลำไผ่
4.นำไผ่ที่เจาะรูแล้วทั้งหมด ทยอยใส่ลงในบ่อ วางให้เป็นระเบียบหลังจากนั้นนำวัสดุที่มีหนักมากวางทับไปอีกทีหนึ่งเพื่อไม้ให้ไผ่ลอยตัวขึ้นมา โดยวัสดุที่หาได้ในขณะนั้นคือยางรถยนต์เก่า
5.แช่ทิ้งไว้อย่างน้อย 3-7 วัน จากนั้นนำไผ่มาตากให้แห้ง หลังจากนั้นก็นำไปใช้ในการก่อสร้างได้ตามปกติ
การดำเนินการก่อสร้าง
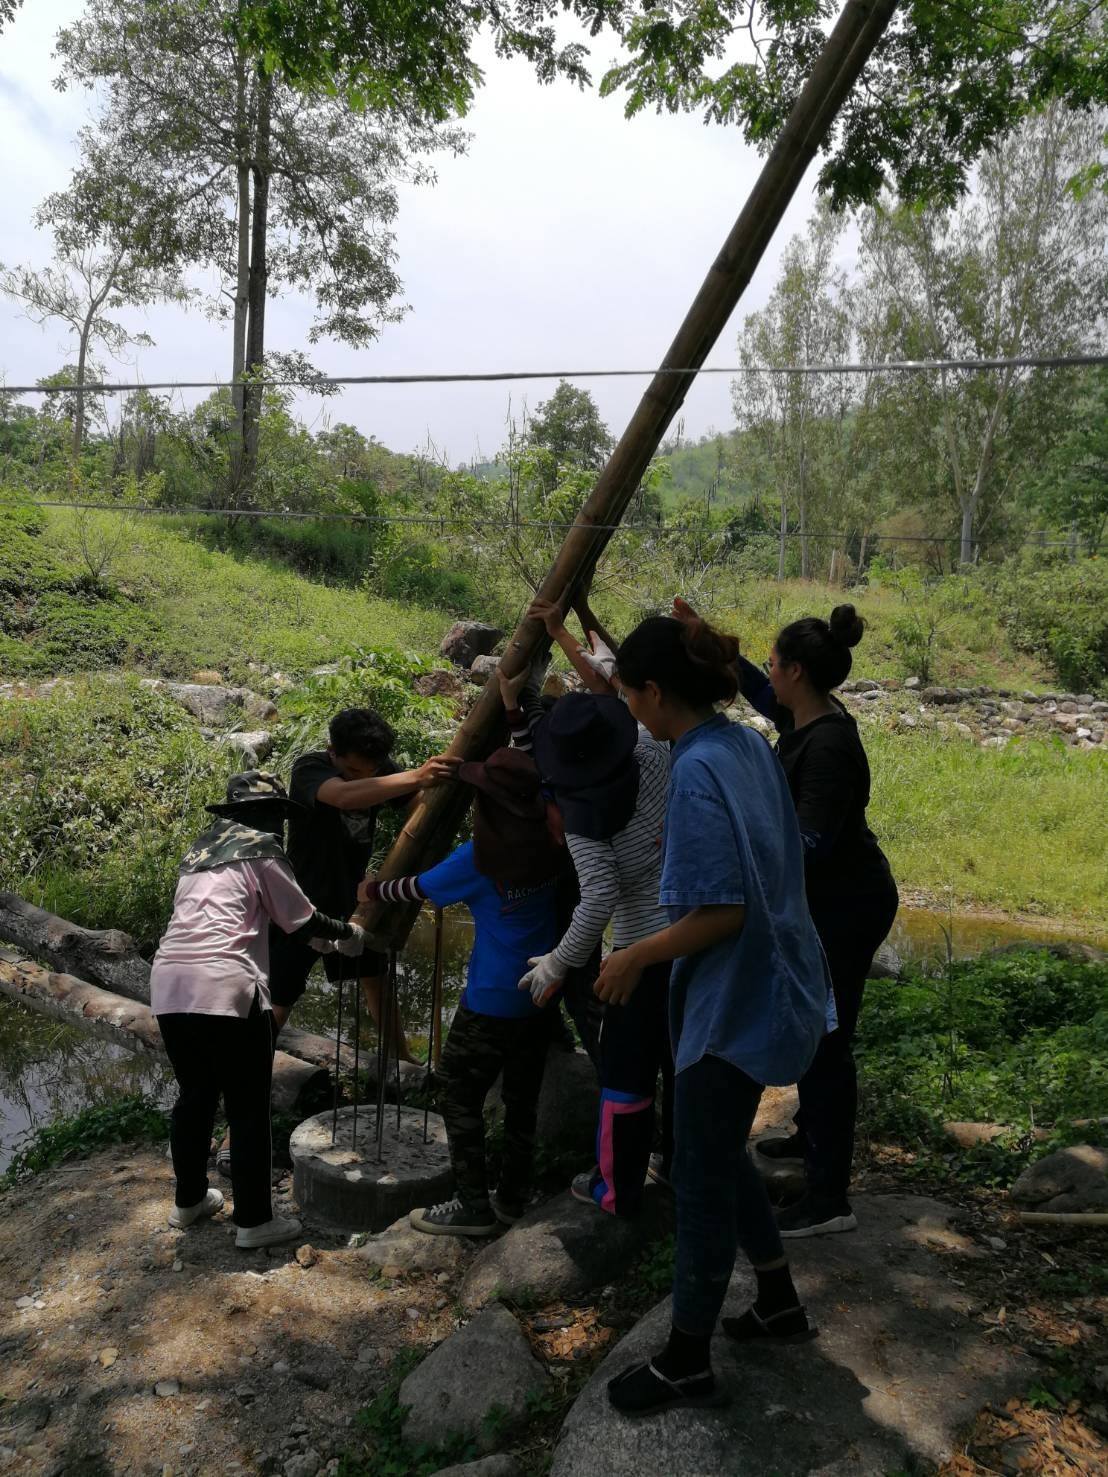
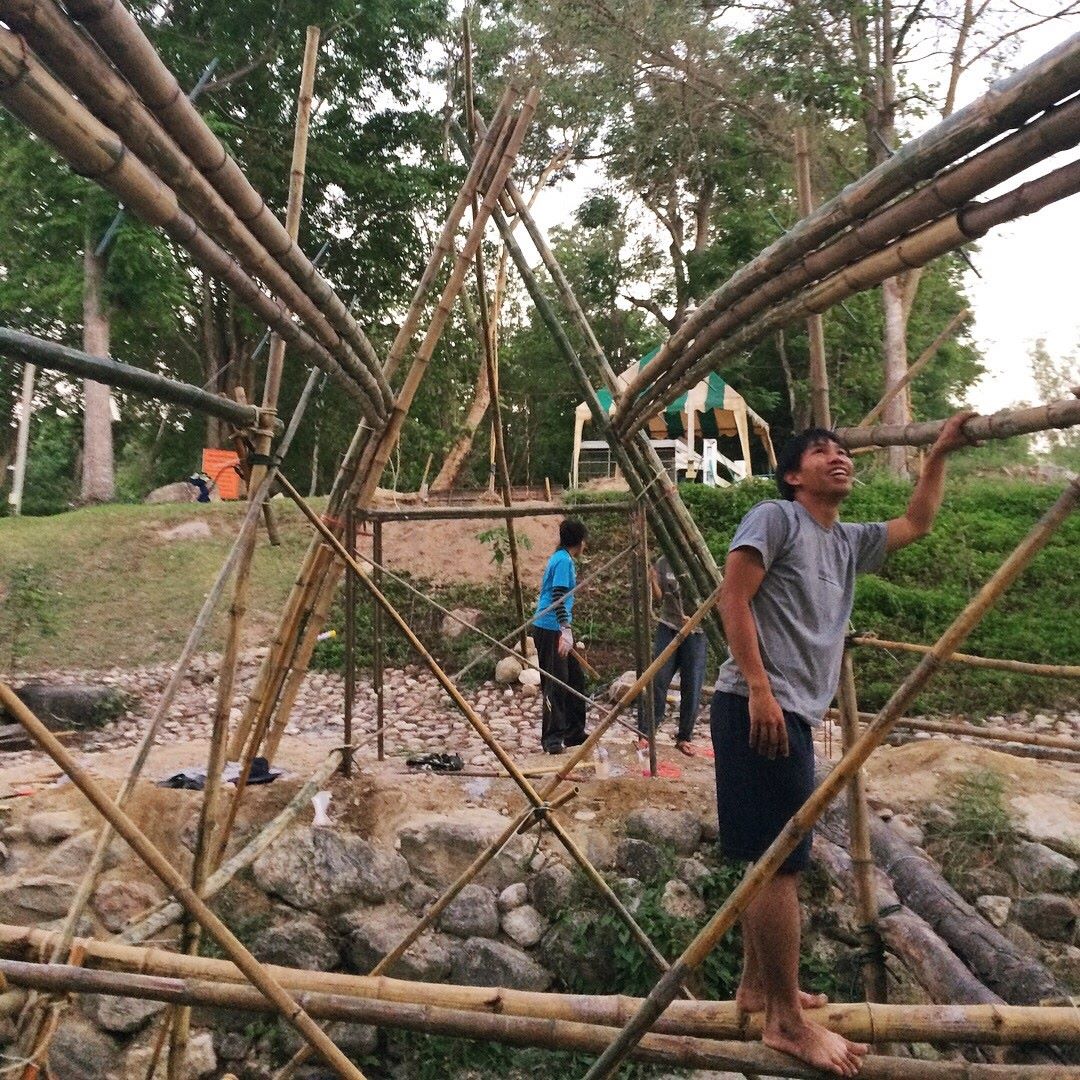
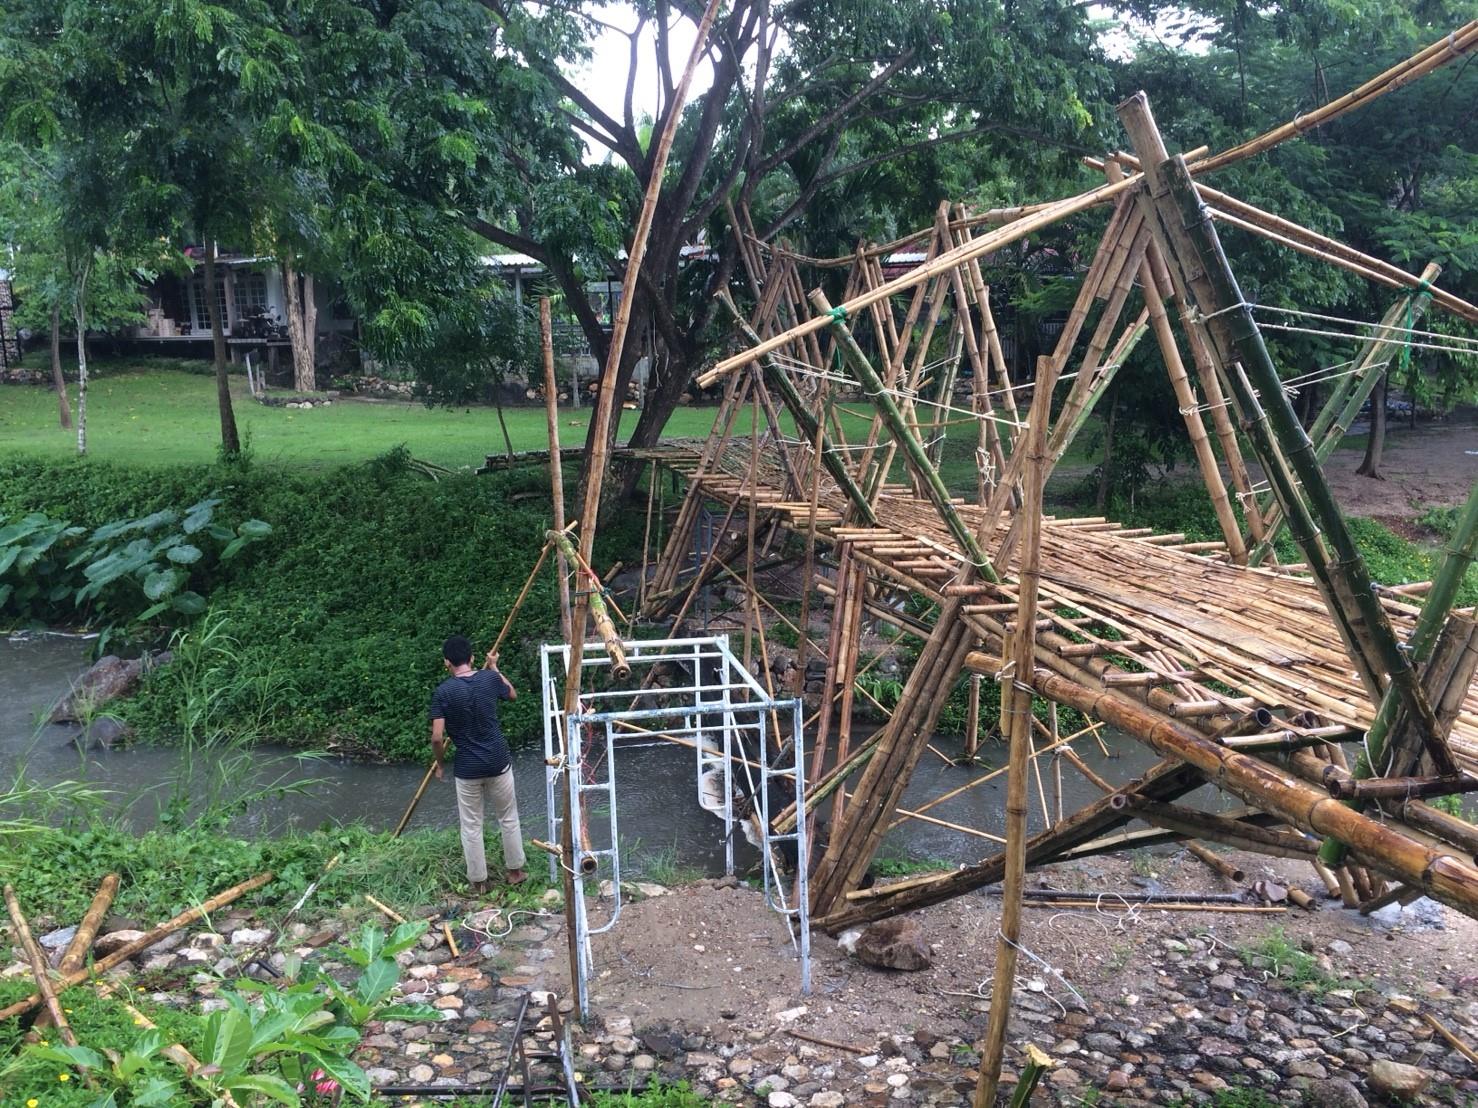
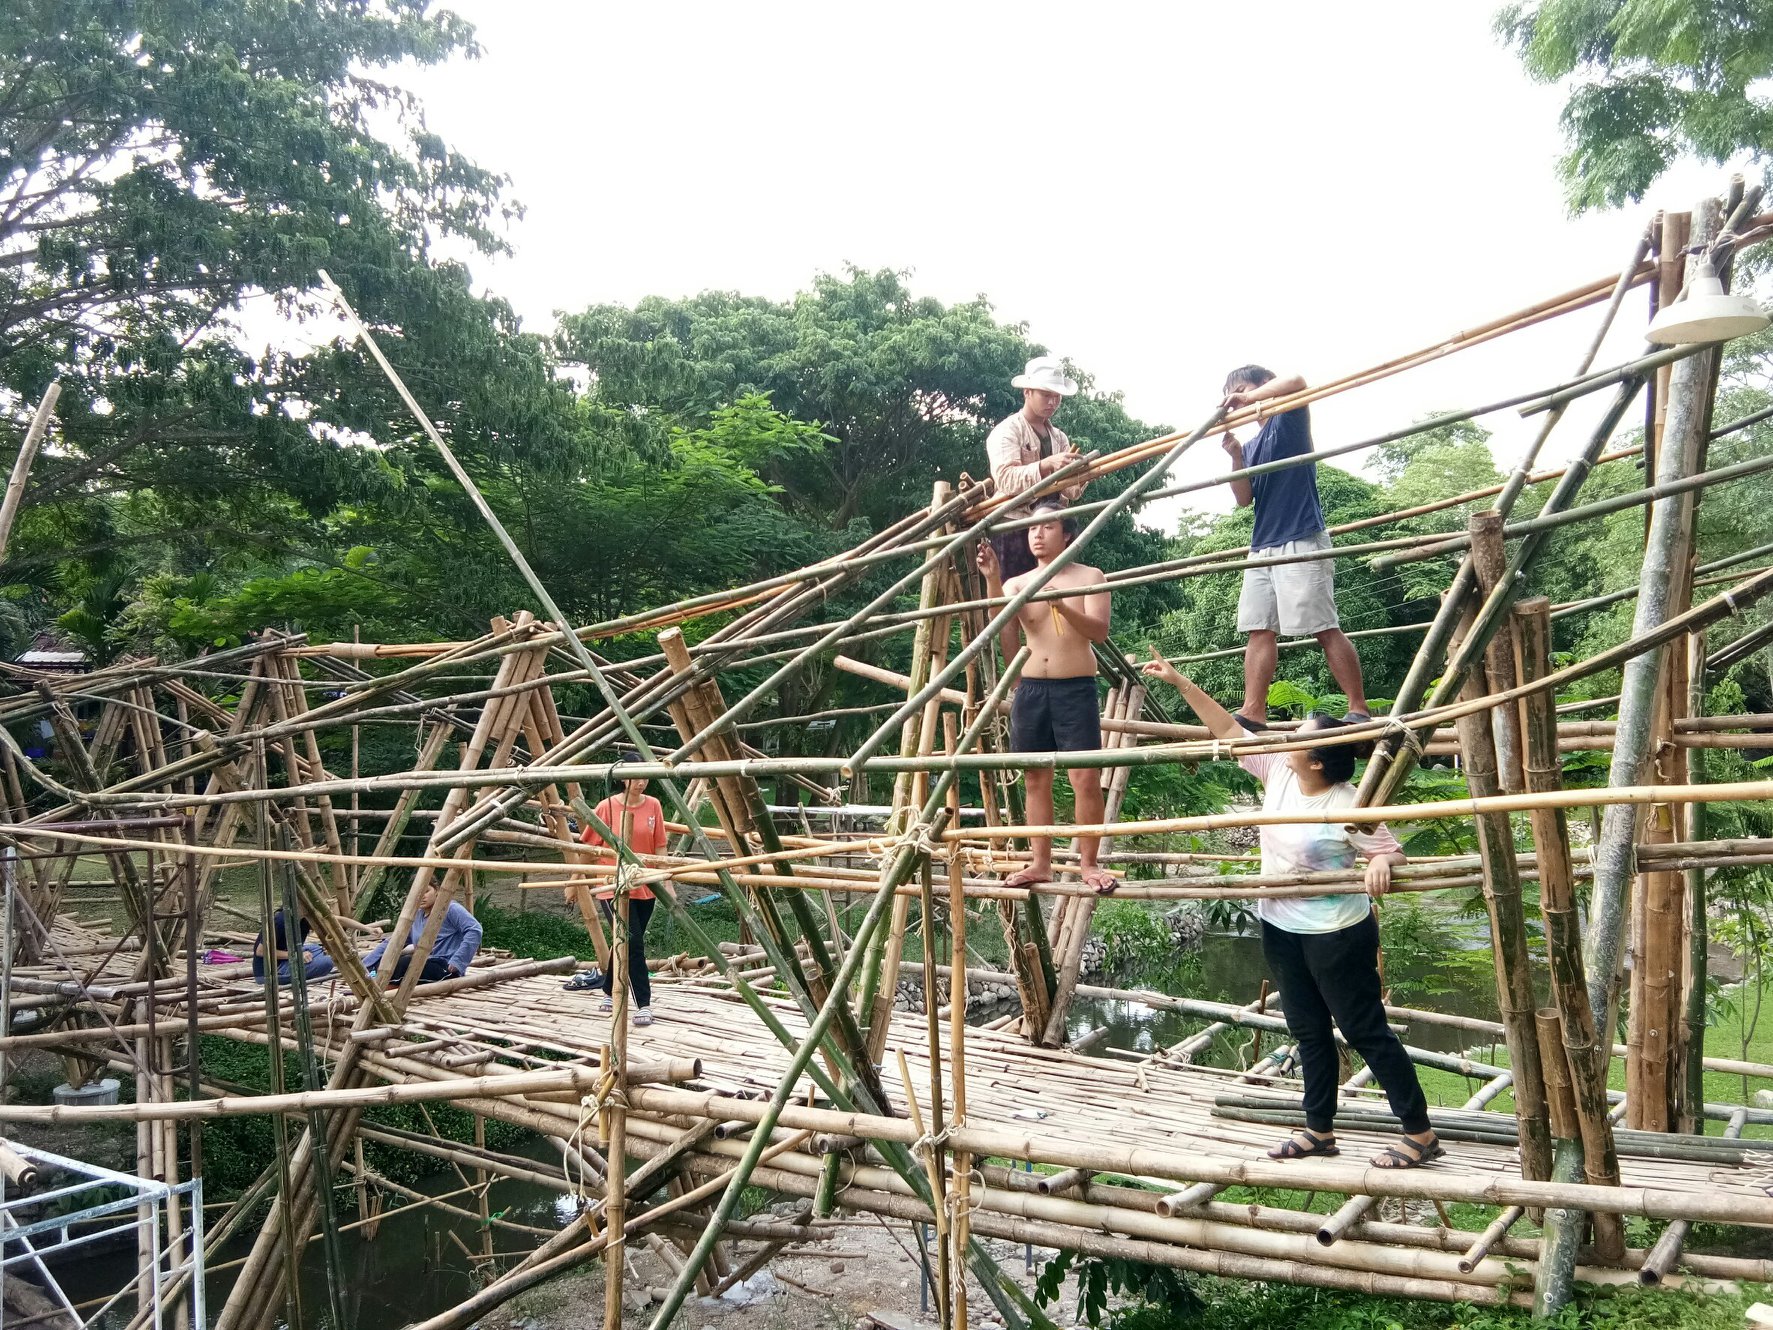
1.วางผังกำหนดตำแหน่งตอม่อโครงสร้างตามแบบโมเดล โดยมีตอม่อทั้ง 5 จุด และอีก 1 ใช้ต้นไม้เป็นโครงสร้างรับน้ำหนักแทนตอม่อ
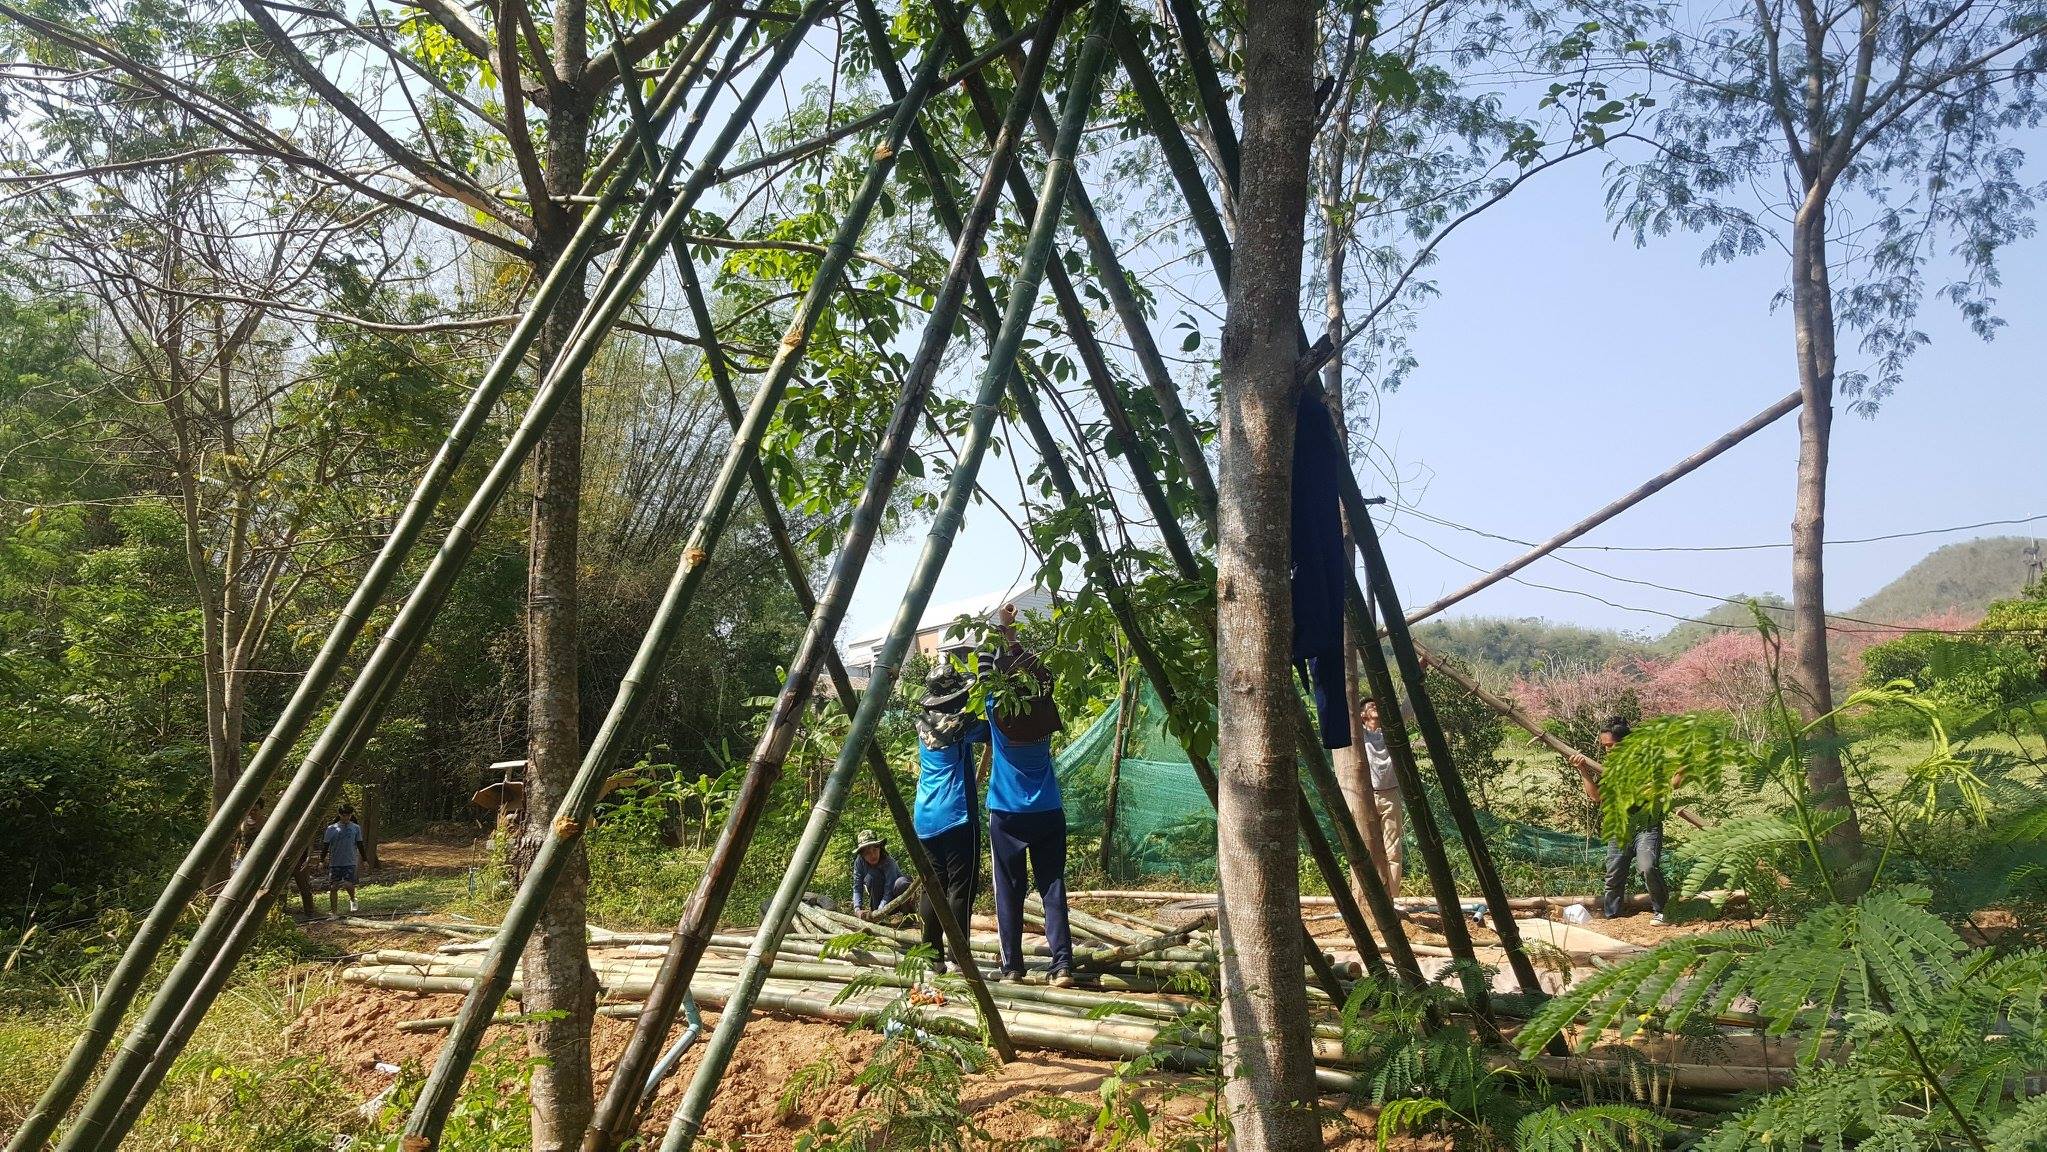
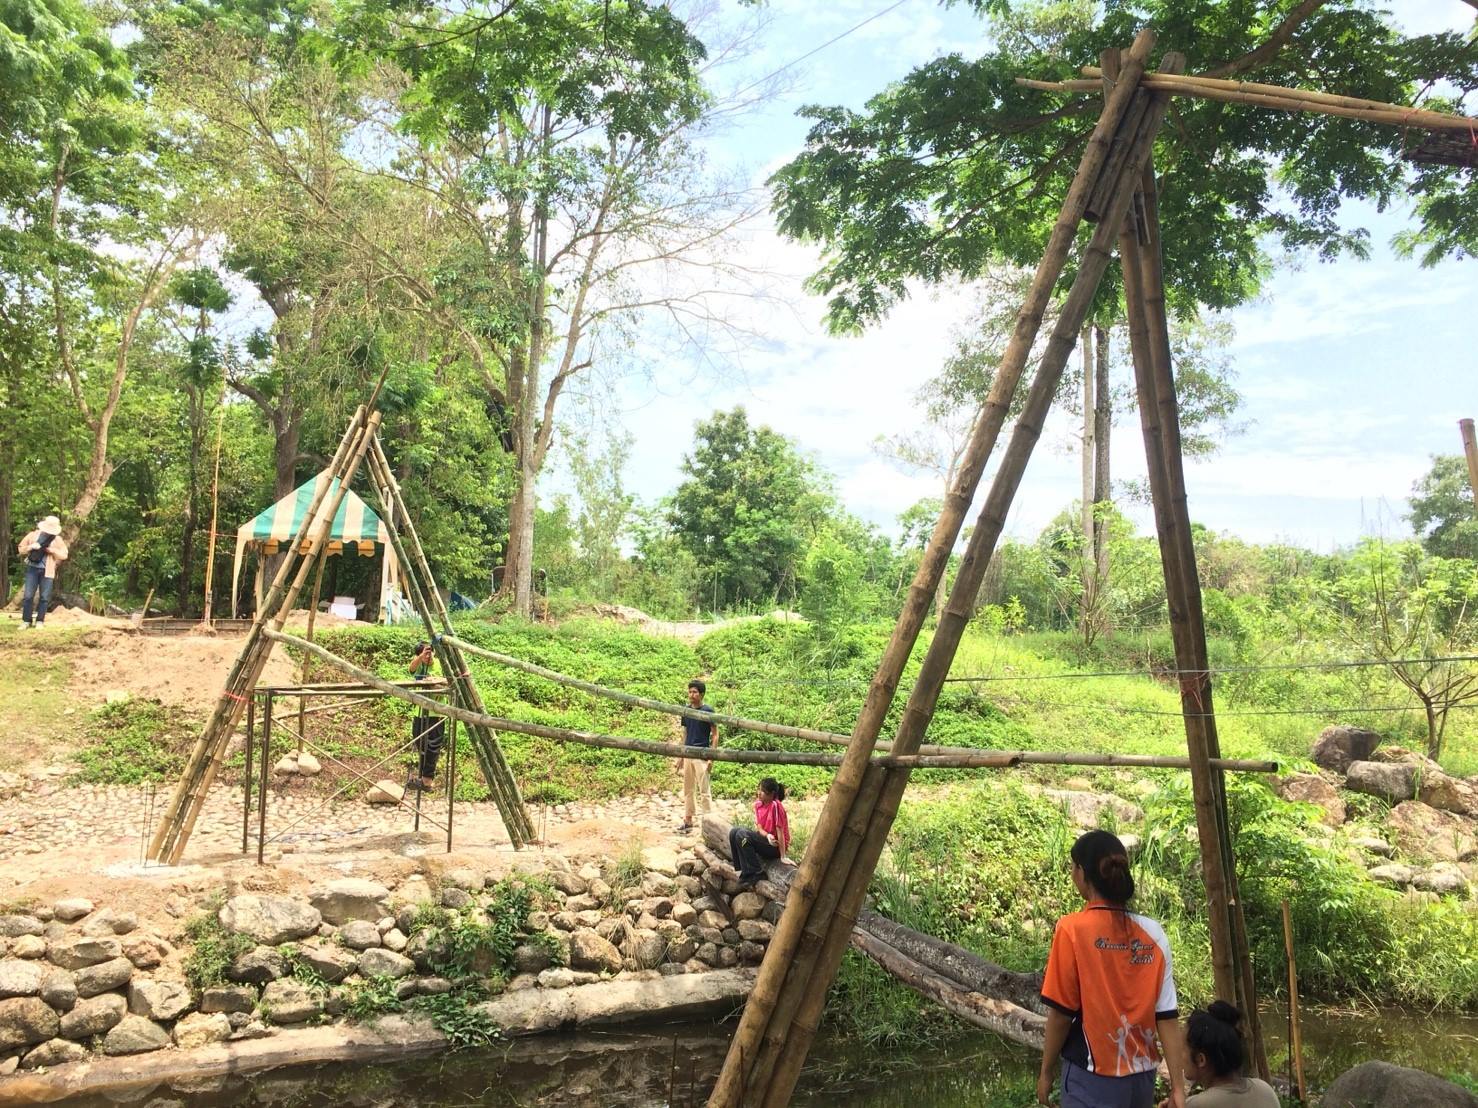
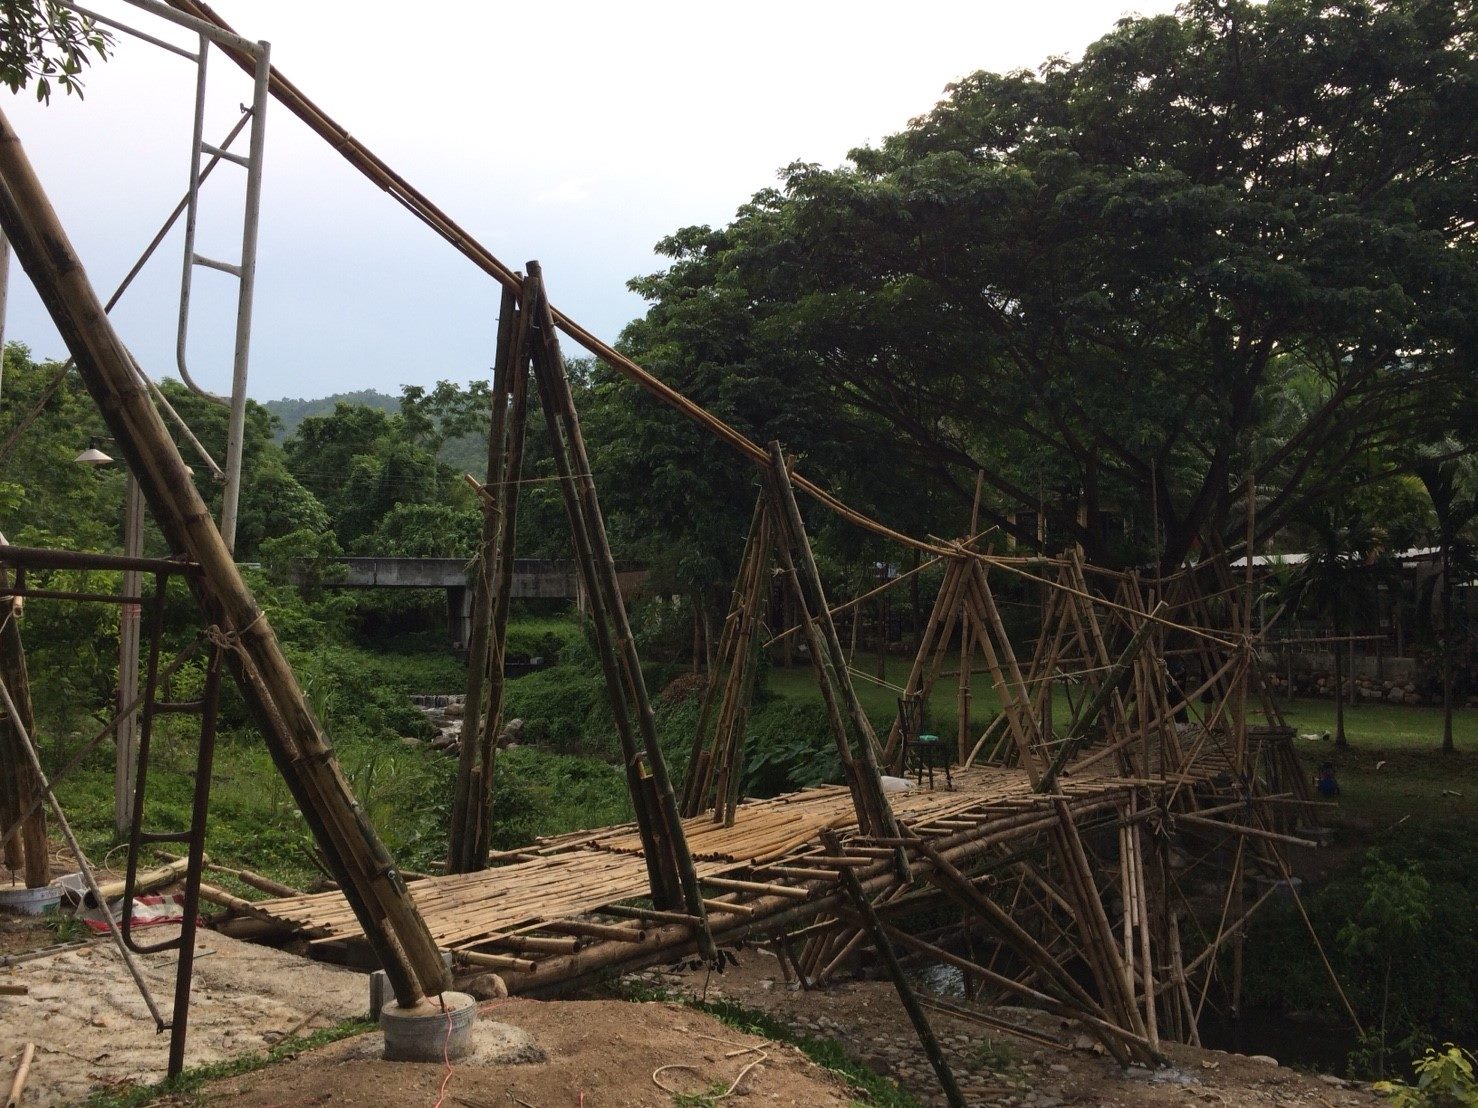
2.ติดตั้งโครงสร้างตัว A จำนวน 4 ตัวโดยมีจุดหนึ่งฝากไว้กับต้นจามจุรี
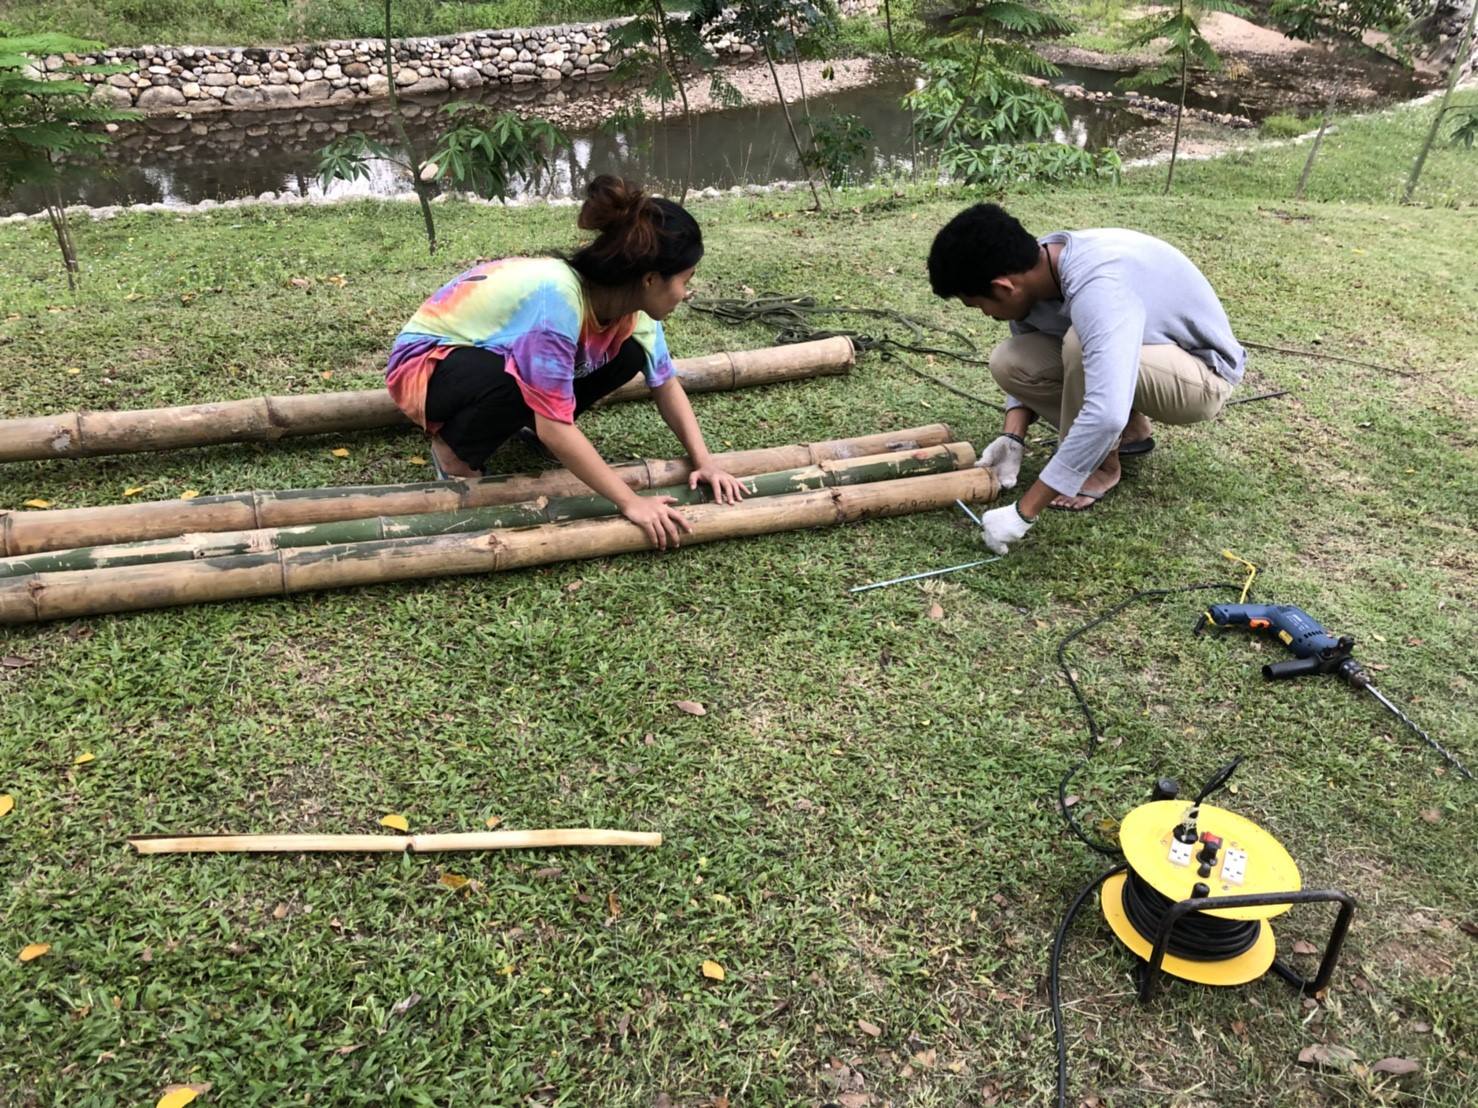
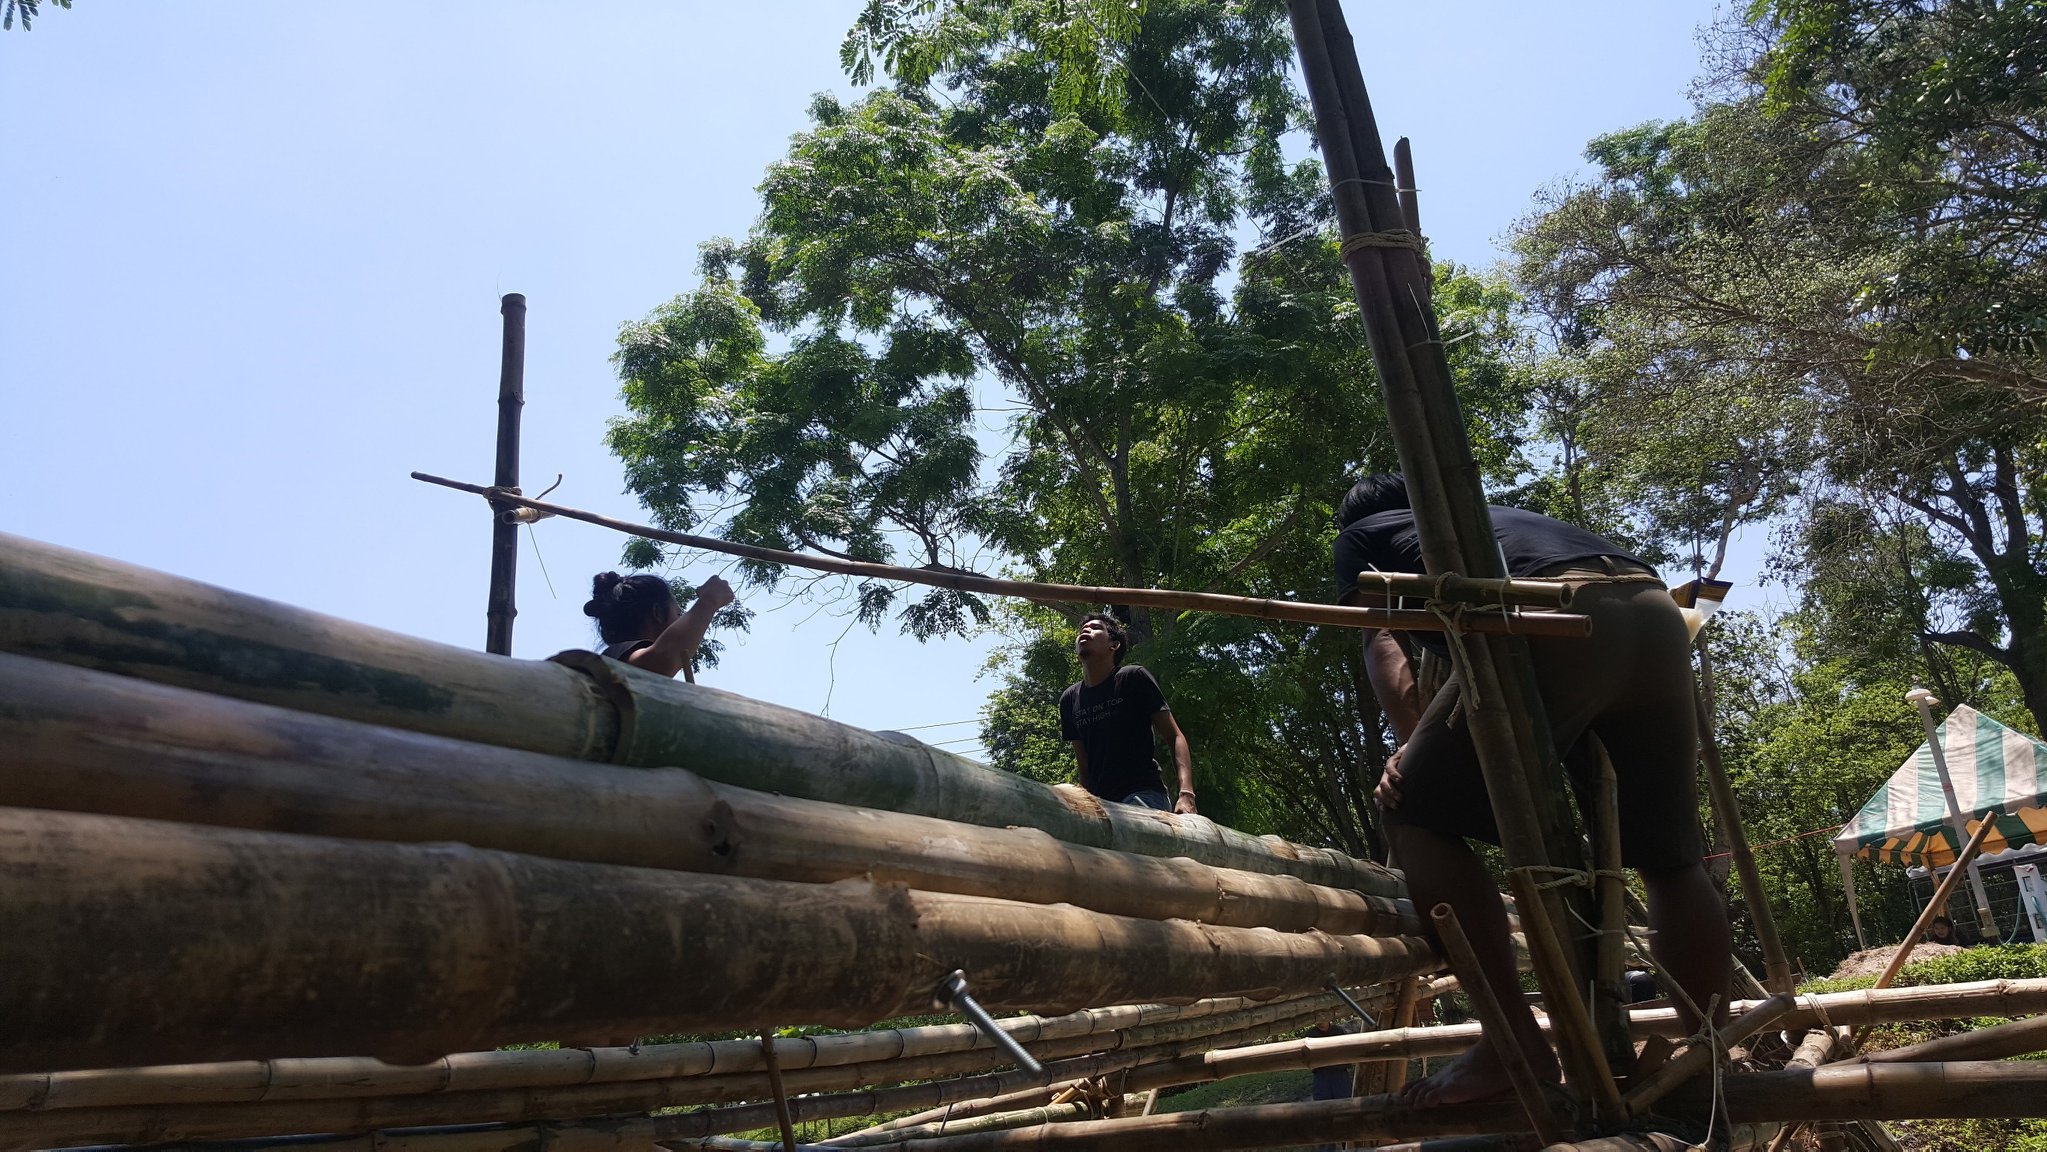
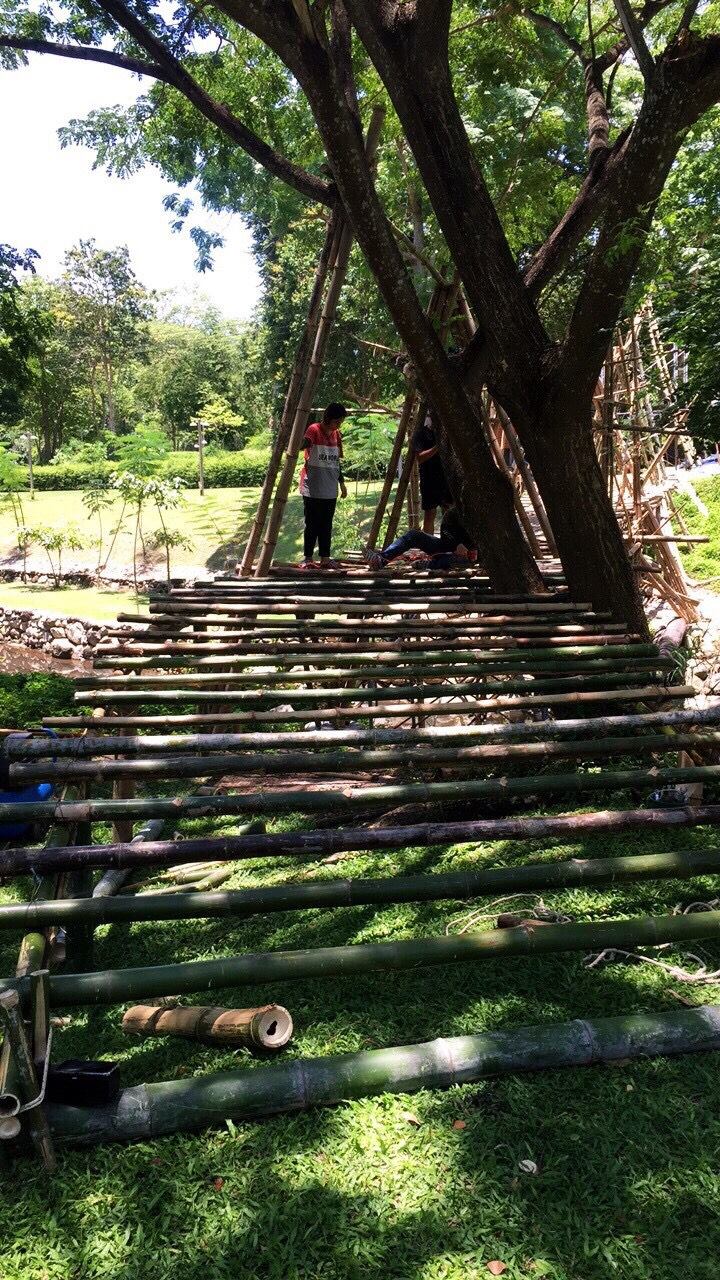
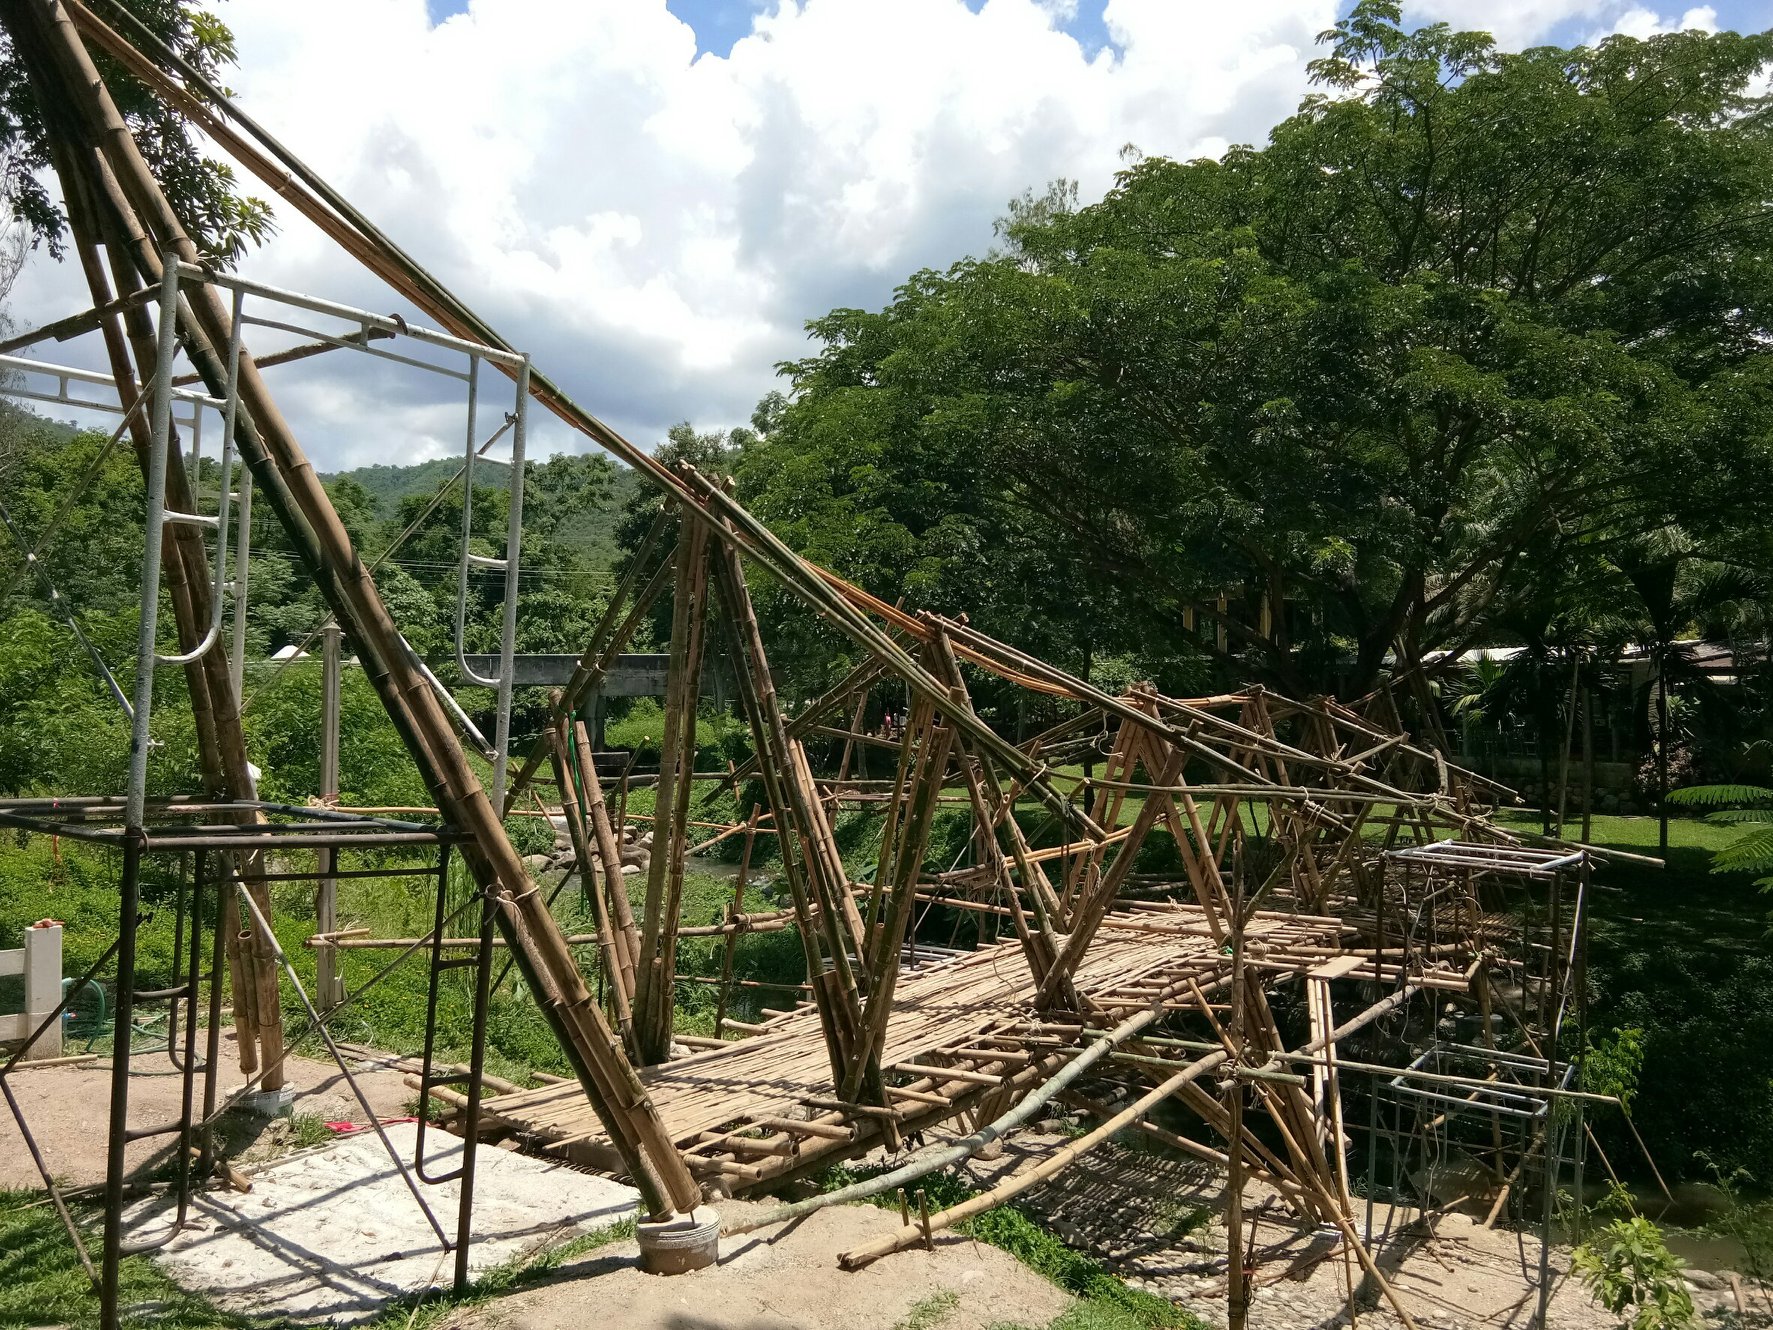
3.ติดตั้งคานไผ่ที่ซ้อนกันเป็นชุด ชุดละ 3 ลำ ยาว 24 ม.
4.ติดตั้งโครงสร้างค้ำยันที่เป็นตัว X เพื่อเพิ่มความแข็งแรงให้กับคาน
5.ติดตั้งโครงสร้างตัว A ที่ไม่ได้เป็นโครงสร้างหลักลงบนคาน
6.ติดตั้งตงโดยใช้ไผ่รวก ผูกกับลวดห่างกันทุกๆระยะ 0.50 ม.
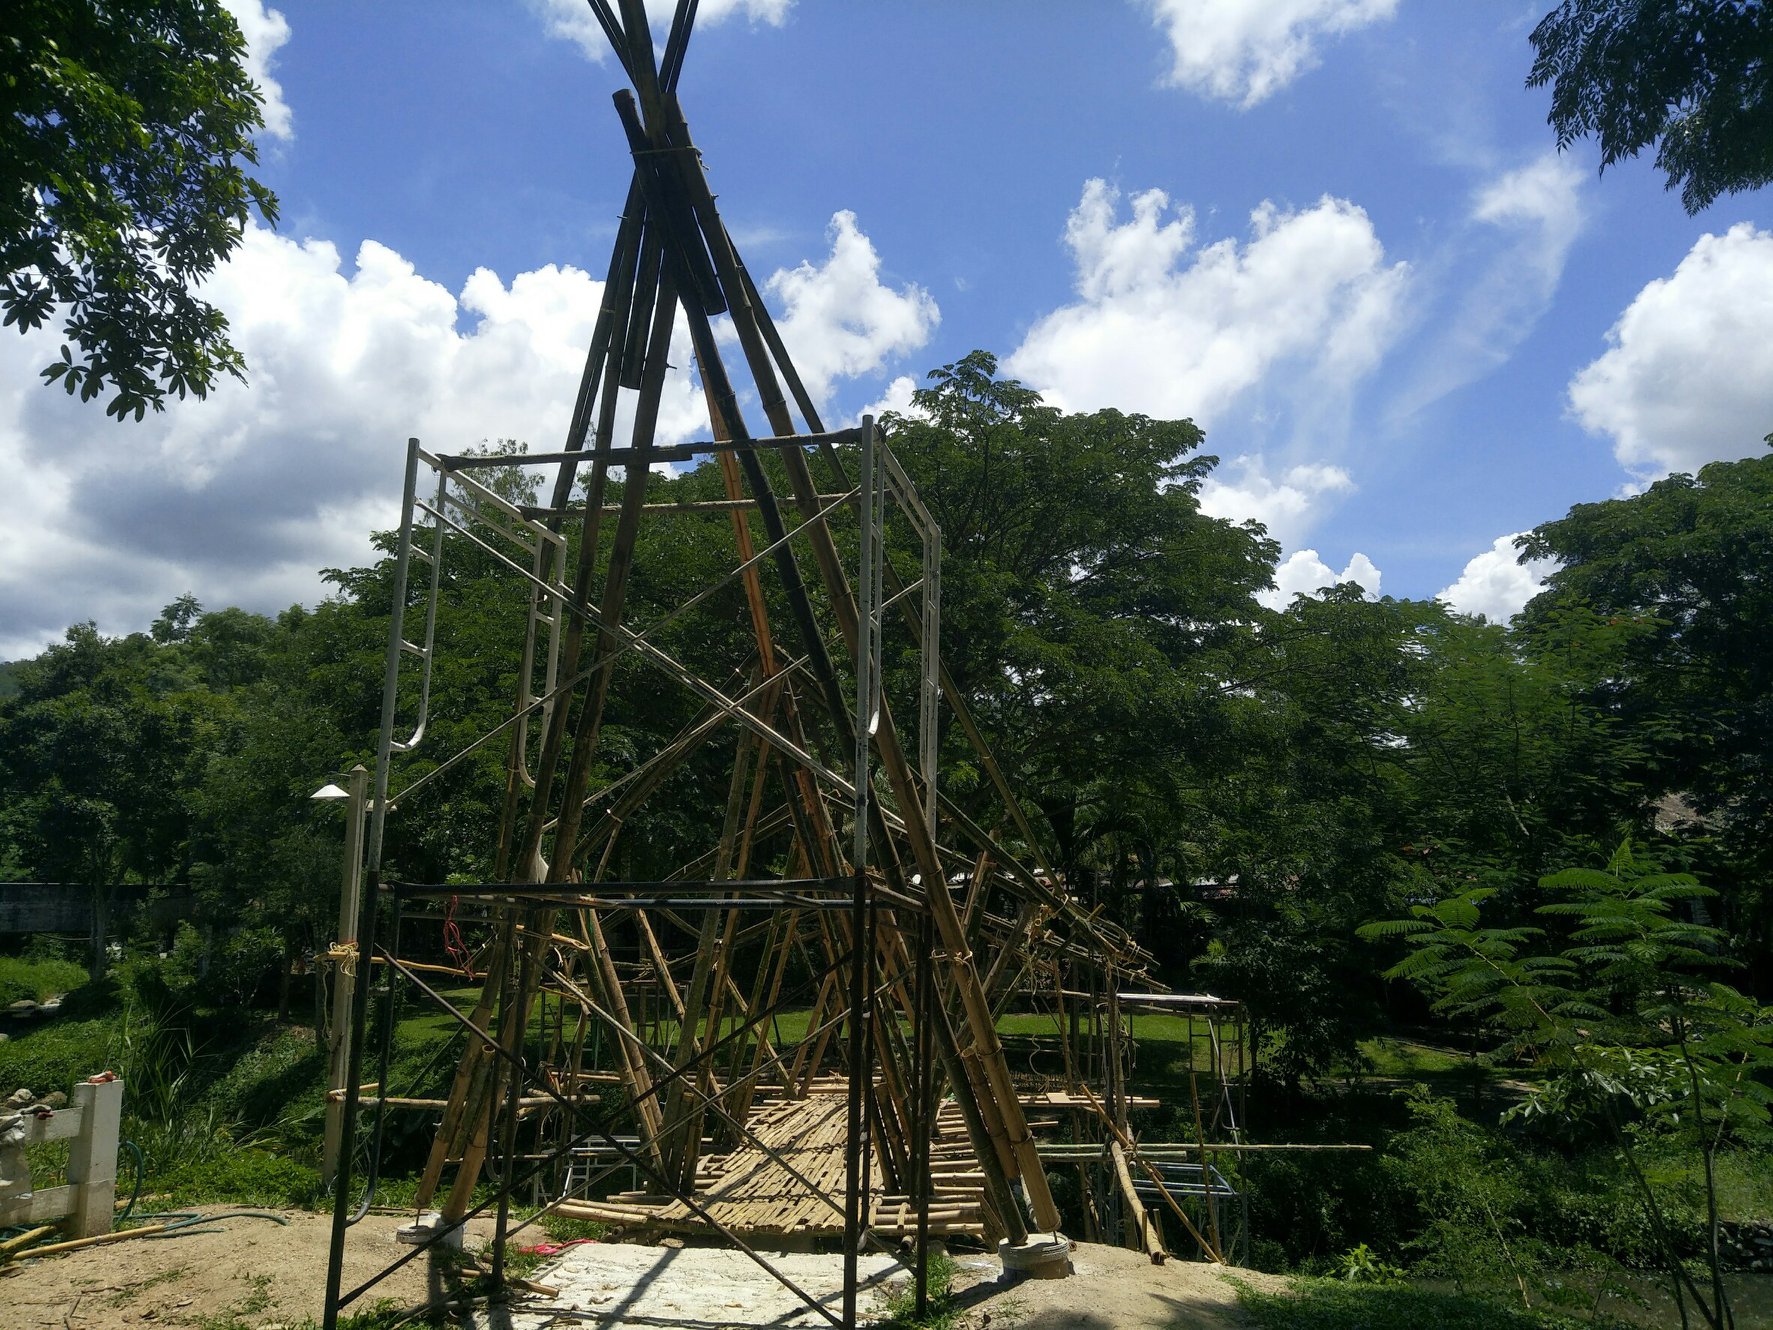
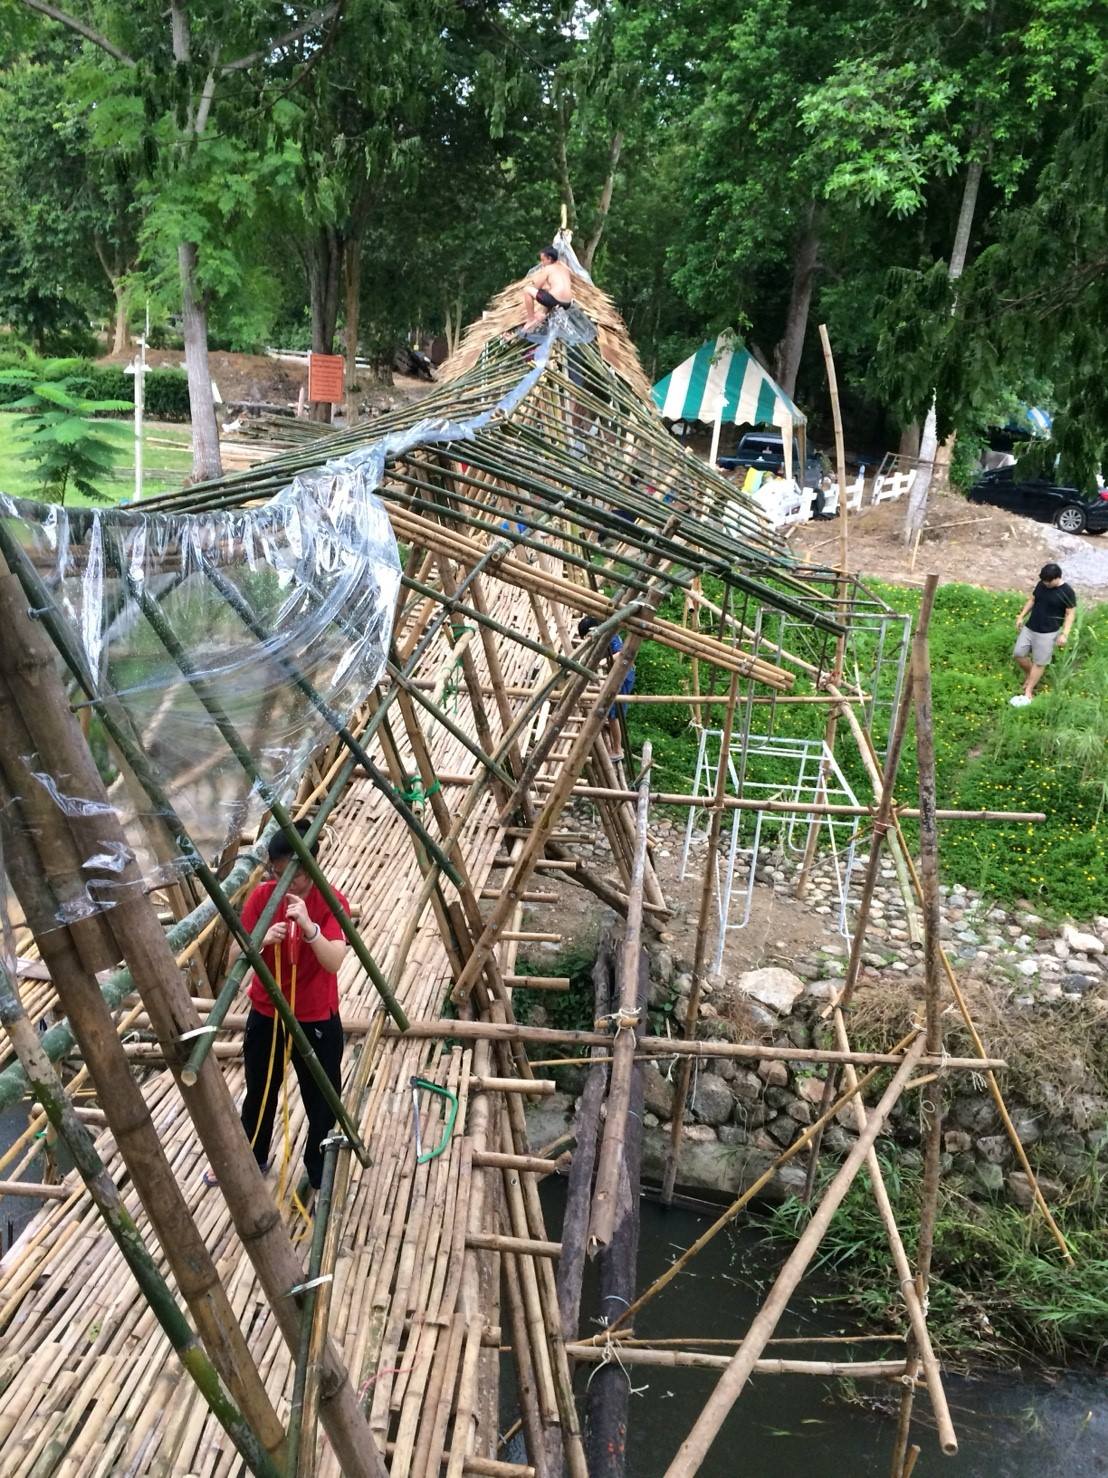
7.ติดตั้งอกไก่บนสุดของโครงสร้างตัว A โดยใช้ไผ่รวก 4 ลำ มัดรวมกัน
8.ติดตั้งจุดซัพพอร์ตโครงสร้างรับอะเสโดยยื่นเป็นค้ำยันออกไปจากโครงสร้างตัว A
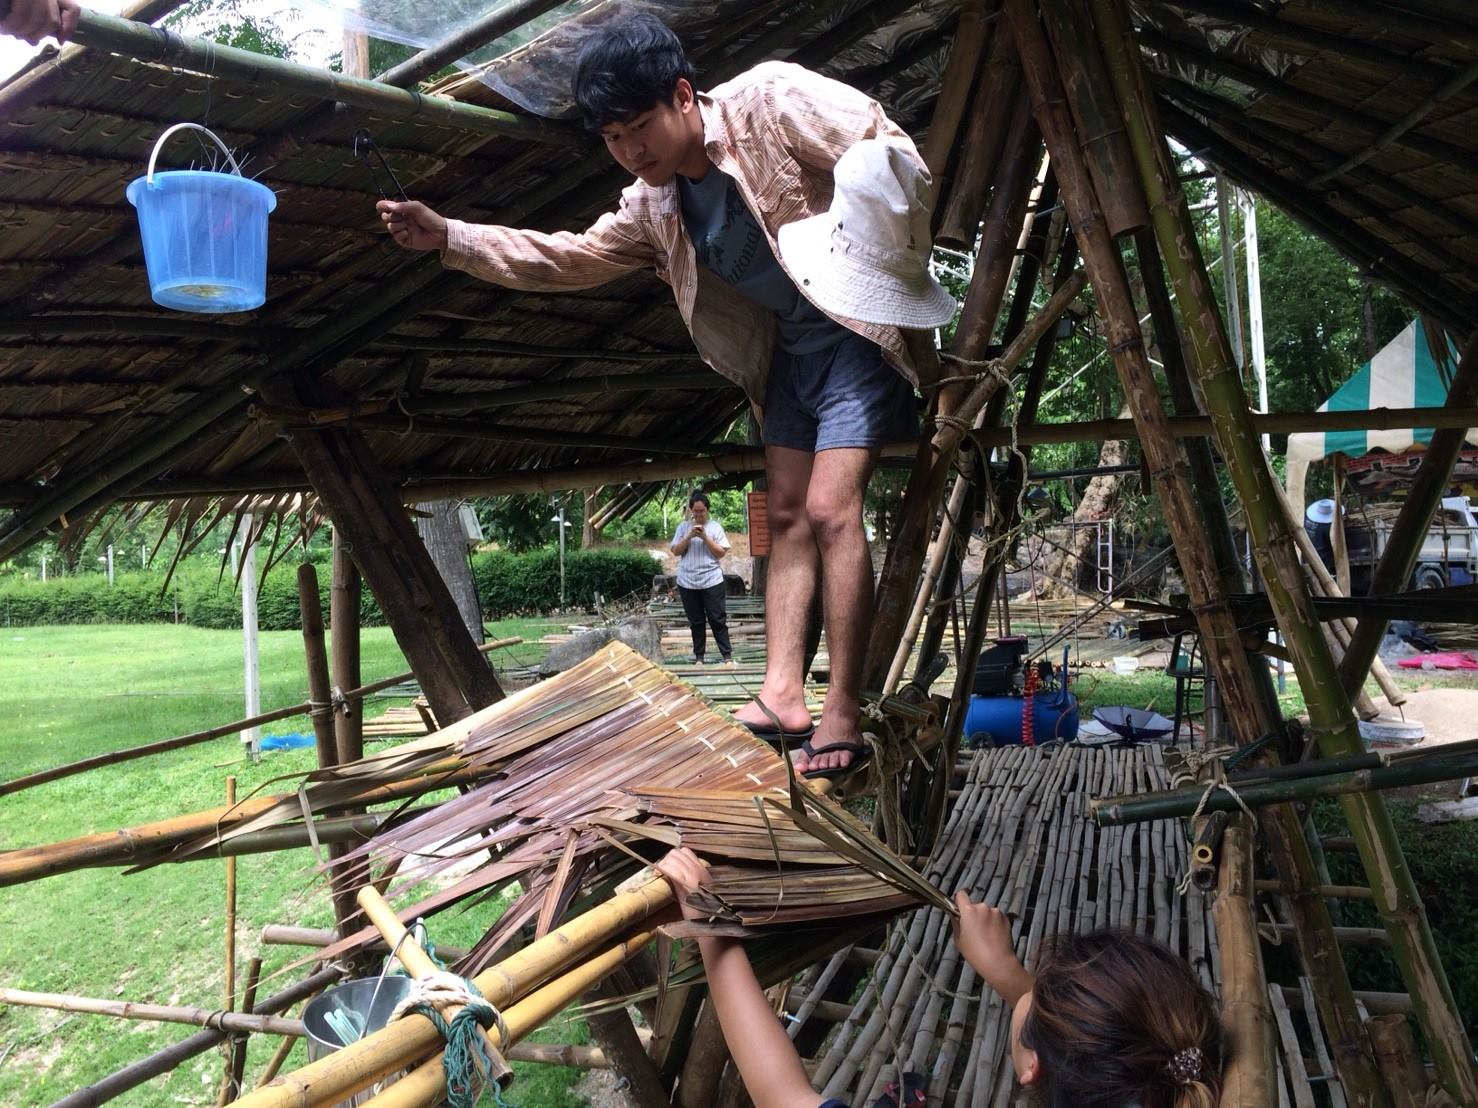
9.ติดตั้งจันทันลงบนโครงสร้างตัว W สำหรับรองรับแปหลังคา
10.ติดตั้งอะเสลงบนโครงสร้างที่เป็นจุดซัพพอร์ตหรือค้ำยันยื่นออกมารับ
11.ติดตั้งแปโดยใช้ไผ่รวก แปแนวนอนห่างกันทุกๆระยะ 1 ม. แปแนวตั้งห่างกันทุกๆระยะ 0.6 ม.
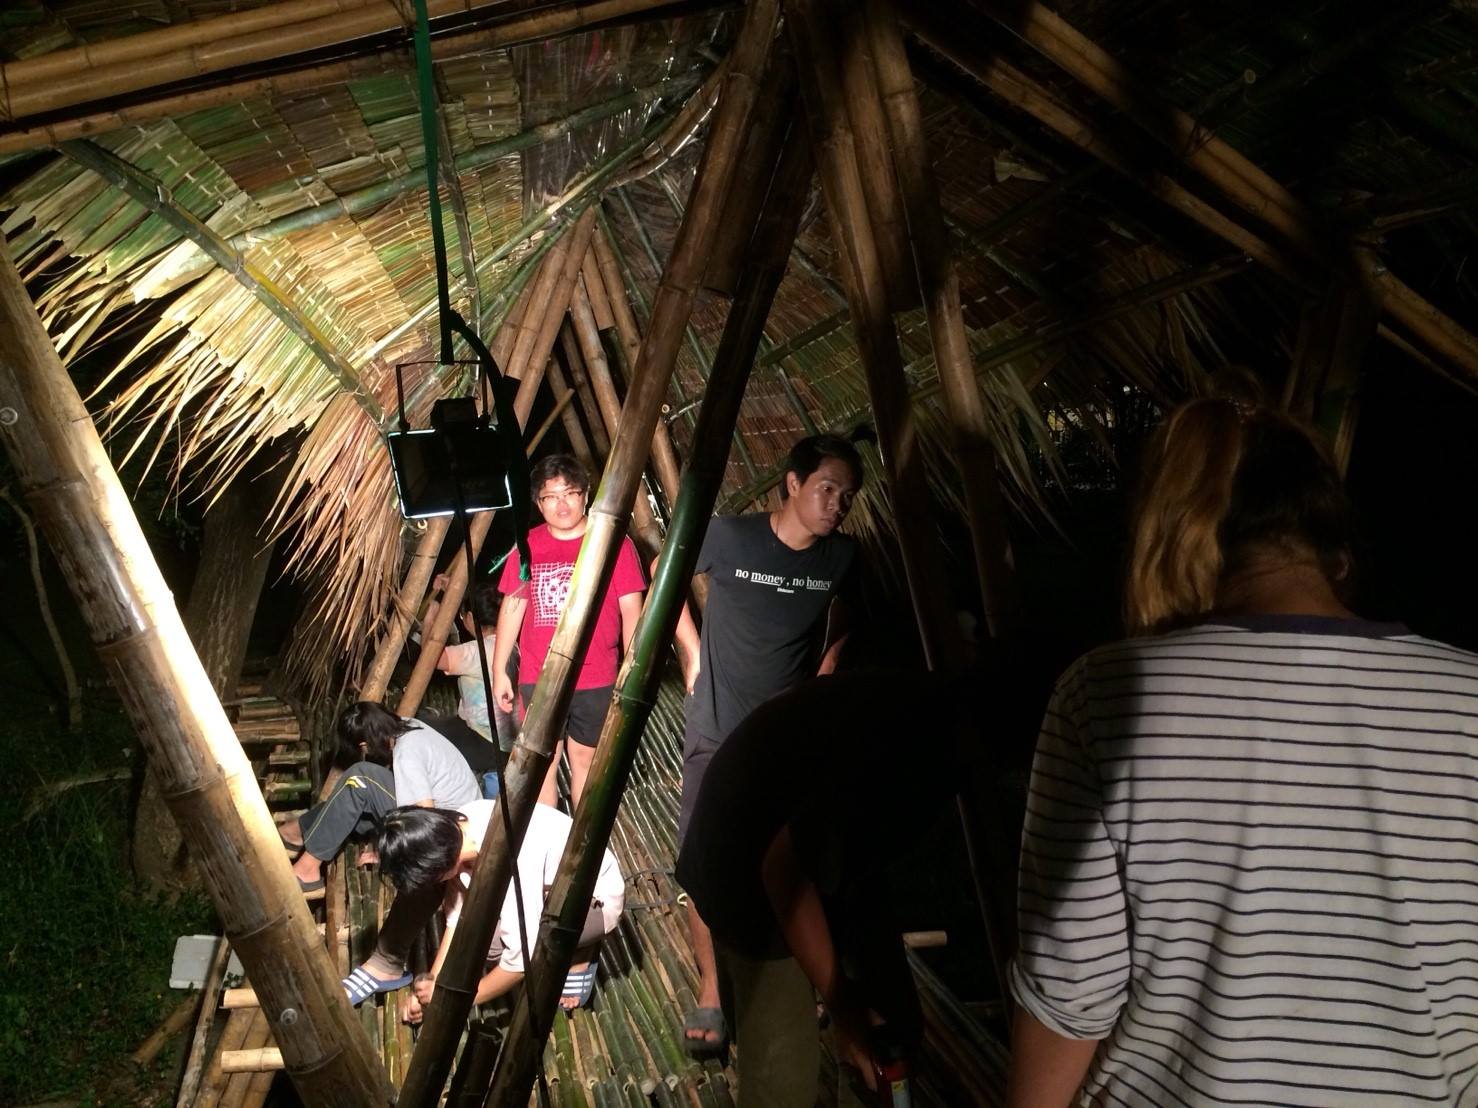
12.ติดตั้งหลังคามุงจากโดยใช้ลวดยึดกับแปแนวตั้ง
โครงการนี้ไม่เพียงแต่เป็นบททดสอบทักษะด้านเทคนิคและการออกแบบของเราเท่านั้น แต่ยังเป็นประสบการณ์การเรียนรู้ที่ลึกซึ้งในการทำงานกับวัสดุธรรมชาติและทำความเข้าใจถึงศักยภาพด้านโครงสร้างของมันอีกด้วย โครงการนี้เป็นจุดเริ่มต้นของการเดินทางของทีม Bamboosaurus และช่วยหล่อหลอมแนวคิดของเราที่มุ่งเน้นการผสานวัสดุที่ยั่งยืนเข้ากับการออกแบบทางสถาปัตยกรรมที่สร้างสรรค์
This project marked the beginning of the Bamboosaurus Team, tracing back to our university days at the Faculty of Architecture and Planning, Thammasat University. In 2018, as part of Bamboo Studio 8+1, we were given the challenge of designing and constructing a bamboo structure—specifically, a bridge.
The bridge was designed to connect a resort to a nearby campsite, as both areas shared functional relationships. The project encompassed the entire process, from preparing the bamboo, surveying the site, measuring water levels, reinforcing the foundations, and assembling the structure according to our design model. This hands-on experience was the catalyst for the formation of Bamboosaurus as a team.
Design Concept
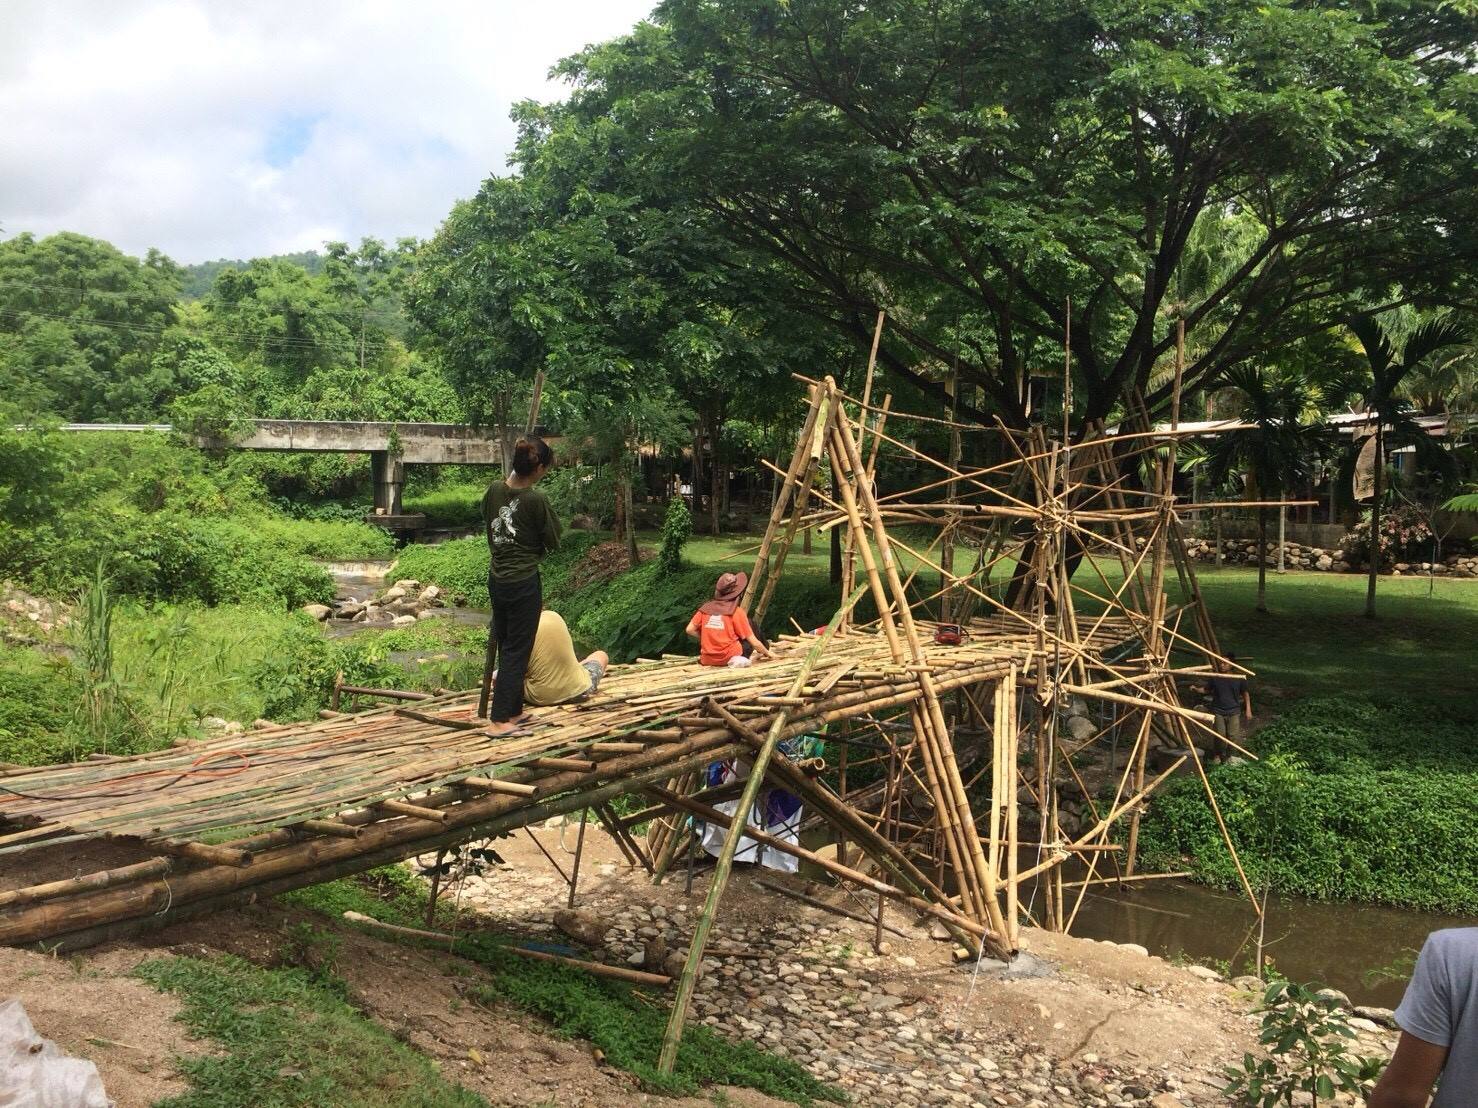
After visiting the site and analyzing its context, we leveraged bamboo’s strength and flexibility as key design elements. The primary structure emphasized stability and robustness, using diagonal and horizontal elements arranged in triangular forms. Meanwhile, the roof design captured bamboo’s natural elasticity, creating an organic freeform shape inspired by lotus petals—a nod to the resort’s name and its surroundings.
The architectural approach seamlessly integrated the bridge with the landscape, allowing users to experience shifting perspectives as they crossed. Additionally, we incorporated the structural characteristics of rain trees (Samanea saman) to function as a natural support column, reducing the need for one of the foundation points while enhancing the architectural appeal.
Material Preparation
To ensure the durability of the bamboo, we sourced it from a nearby bamboo grove and preserved it using the following steps:
Construction Process
This project was not only a test of our technical and design skills but also a deeply immersive learning experience in working with natural materials and understanding their structural possibilities. It laid the foundation for our journey as the Bamboosaurus Team, shaping our philosophy of integrating sustainable materials into innovative architectural design.

